


Showing posts with label recipes. Show all posts
Showing posts with label recipes. Show all posts
Thursday, May 15, 2014
If your weeknight are like mine, then they are super busy! Between work and baseball games and practices and just plain ole everyday life, I don't always have time to make a gourmet meal, heck, who am I kidding, most nights I barely have time to heat up Hamburger Helper. Since I work nights, I am always on the lookout for a great Crock Pot meal that I can prepare in the morning and forget about it until it's time to chow down at night. Thankfully I have an amazing cousin who definitely knows her way around the kitchen, who turned me on to something that is sure to become a favorite in our house, Crock Pot French Bread Pizza.
Now, I don't think Tiff called it that, but it's definitely what the mixture brings to mind (side note: this would also make a killer lasagna filling). So if you're on the lookout for a quick, easy, oh-so yummy crock pot meal...check this one out!

1 pound of ground beef (browned and drained)
2 jars of pizza sauce
1 block of cream cheese
8 oz. bag of shredded Mozzarella cheese
1 cup bacon (cut into small pieces)
1 package pepperoni (cut into small pieces)
1. Brown and drain one pound of ground beef.
2. Add ground beef, pizza sauce, cream cheese, half of the mozzarella cheese, bacon and pepperoni to slow cooker and cook on Low for 4-6 hours.

3. Slice french bread in half long ways and pop under the broiler until brown.

4. Top french bread with a generous helping of the "sauce/filling", top with remaining cheese and place back under the broiler until bubbly and brown.

5. Enjoy!
Now, I don't think Tiff called it that, but it's definitely what the mixture brings to mind (side note: this would also make a killer lasagna filling). So if you're on the lookout for a quick, easy, oh-so yummy crock pot meal...check this one out!
Crock-Pot French Bread Pizza "Sauce/Filling"
Ingredients
2 loafs of French Bread1 pound of ground beef (browned and drained)
2 jars of pizza sauce
1 block of cream cheese
8 oz. bag of shredded Mozzarella cheese
1 cup bacon (cut into small pieces)
1 package pepperoni (cut into small pieces)
Directions
1. Brown and drain one pound of ground beef.
2. Add ground beef, pizza sauce, cream cheese, half of the mozzarella cheese, bacon and pepperoni to slow cooker and cook on Low for 4-6 hours.
3. Slice french bread in half long ways and pop under the broiler until brown.
4. Top french bread with a generous helping of the "sauce/filling", top with remaining cheese and place back under the broiler until bubbly and brown.
5. Enjoy!
Friday, October 11, 2013
I love Halloween! And I love the opportunity to share anything Halloween related with all of you, so I thought these Halloween Frankenpops would be perfect. I am definitely going to try these for my daughter's birthday party this weekend--they're so cute!

Here's a cute video with step-by-step instructions to make these adorably spooky Halloween treats! Check out the recipe below, courtesy of The Kitchen Explorers from PBS Parent.

Here's a cute video with step-by-step instructions to make these adorably spooky Halloween treats! Check out the recipe below, courtesy of The Kitchen Explorers from PBS Parent.
Recipe: Frankenpops
A quick and easy marshmallow treat recipe for Halloween. Made with chocolate candy coated marshmallows, making these treats make for a great Halloween activity.Ingredients
- 1 – 16 ounces dark green candy coating
- 2 tablespoons white candy coating
- 2 tablespoons black candy coating
- 1/4 cup purple candy coating
- 1 bag large marshmallows
- special equipment: 36 lollipop sticks
Instructions
- Melt the dark green candy coatings in the microwave in thirty second intervals, stirring after each time until the chocolate is smooth.
- Dip a lollipop stick ¼” in and then into a marshmallow ¾ of the way through.
- Dip marshmallows into the melted coating, turning the marshmallow as it coats.
- Tilt the marshmallow over a cup and gently tap the stick until excess coating drips off.
- Allow the pops to dry by sticking the end of the stick into a foam block.
- As the pops dry, make the eyes by piping small 1/8-1/4-inch circles of melted white coating. Finish the eyes by adding a small speck of melted black coating to the center of the white "eye balls." Allow the eyes to harden before using.
- Once the green coated pops are hard, dip only the top of each marshmallow in the melted purple coating. Using a toothpick, add texture to each pop's hair. Allow the hair to dry before adding facial features.
- Add a little dot of chocolate where the eyeballs will be placed. Using the melted coating as glue, add two eyeballs to every pop.
- Using an edible black ink marker or melted black coating which is in a piping bag with a tiny opening, pipe a decorate scar and mouth on each pop.
- Allow the pops to harden before eating.
Thursday, September 12, 2013
I don't know how after-school goes down at your house, but at my house, it means FOOD and lots of it. I can't tell you how often my kids get off of the bus, come through the door (barely acknowledging my presence) and make a beeline for the refrigerator. With four hungry kiddos looking for something quick, easy and delicious to snack on, I'm constantly looking for new snack ideas that are easy enough for them to prepare themselves and yummy enough for Mom to sneak one or two if need be...what? Moms get hungry too ya know. That's one of the reasons why I love Farm Rich, they're products are easy to prepare, super quick (even in the oven) and so good that my kids routinely ask for them at the grocery store.
Farm Rich has been a much loved brand at our house for years and though I love the old standbys (my favorites are the Mozzarella Bites and Mozzarella Sticks). I also get excited when they introduce new products and this summer they introduced three new products that have quickly become favorites at our house. Toasted Ravioli, Crispy Dill Pickles and Chili Cheese Bites are the three newest creations from Farm Rich and they are all three every bit as scrumptious as they sound!
Toasted Ravioli makes a quick and easy family dinner--perfectly crispy and golden brown with melted Mozzarella, Parmesan, Asiago and Romano cheeses inside. Crispy Dill Pickles are inspired by a Southern favorite, lightly breaded and seasoned to make a delicious snack or appetizer. Chili Cheese Bites bring flavor in every bite, with smooth cheddar cheese and a mild chili sauce in a crispy corn chip coating.


Farm Rich sent us free product coupons to try out some of the new products and I personally couldn't wait. At the store I picked up the Crispy Dill Pickles and Chili Cheese Bites to try out in addition to my favorite Mozzarella Bites. As soon as the kiddos came home from school and saw Farm Rich in the freezer they asked for them, in the name of reviewing them of course...they're smart ones I tell ya. One of the things I love most about Farm Rich products (aside from them being seriously delish) is that they take no time to cook in the oven which is great when you have several hungry kids. I've never been much of a fan of Fried Pickles, which is strange since I love pickles as much as I do, but I tried them anyway and actually thought they were pretty darn good, my kids however, couldn't get enough of them (especially dipped in ranch dressing--which turns my stomach even thinking about it, but whatever works I guess). I was skeptical about the Crispy Dill Pickles actually being crispy, but much to my surprise they were very crispy. While I wasn't big on the fried pickles, I couldn't wait to try the Chili Cheese Bites, I mean chili, cheese and a crispy corn chip coating--what's not to love...seriously? With one bite I was in heaven, honestly people, these things should be illegal, I mean, I'm not even sure that the kids had more than one each because I seriously made them and then went and hid in my room until they were finished--yes...they're that good! Make sure you check out the quick meal and appetizer recipes inspired by Farm Rich as well, you'll be glad that you did!
If you haven't tried Farm Rich (or if you're already a Farm Rich fan and just haven't tried their newest offerings) you SO should, honestly, you'll be an instant fan! Speaking of fans, make sure you head on over and Like the Farm Rich Facebook Page and Follow @FarmRichSnacks on Twitter and Pinterest for the latest news and products!
WIN IT!
I hope y'all are hungry, because one lucky MIBR reader is going to score some coupons for FREE Farm Rich products! For official rules and to enter check out the Rafflecopter Widget below! Good Luck!
a Rafflecopter giveaway
Disclosure: I received free product coupons to facilitate my review...all opinions are my own and were not influenced by Farm Rich or anyone else.
Tuesday, August 27, 2013
One of my very favorite things in life is fajitas—I seriously cannot get enough of them—so since it’s summer (for a few more glorious days anyway) I thought I’d change things up a bit and combine two of my favorite things (fajitas and grilling) and come up with something amazing….Grilled Chicken Fajita Kabobs!
2 large green peppers cut into bite sized chunks (red and yellow peppers work well too and look gorgeous)
1 medium to large onion cut into chunks (same size as peppers and chicken)
1 package of fajita seasoning
1/4 tsp. vegetable oil
1/4 cup (or less) water
bamboo (or metal skewers)
2. Cut chicken into bit size pieces (small enough to cook quickly, but large enough to fit securely on the skewers) and add chicken to one of the shallow dishes, cover and refrigerate for at least 30 minutes.
3. Cut peppers and onions into bite size pieces (the same size as the chicken), add peppers and onions to the second shallow baking dish, cover and refrigerate for 30 minutes.
4. Heat grill to appropriate temperature, I usually put my food on when the grill has reached 350°. *If using bamboo skewers place skewers into warm water for at least 30 minutes before putting on the grill.*
5. Place chicken, peppers and onions on skewers, leaving room at the top and bottom to allow for easy pickup, alternating between the three until skewers are full.
6. Place skewers on the grill until chicken is cooked through. This usually takes just a couple of minutes per side.
7. You can either eat the chicken fajita kabobs on the skewer or slide the chicken and veggies off onto a warm flour tortilla and add your favorite toppings (this is the way I prefer).
There you have it…a super easy, somewhat quick, and completely delicious dinner that’s a yummy variation of a Mexican favorite! Bon Appétit !
Grilled Chicken Fajita Kabobs

Ingredients
4 chicken breasts diced into small chunks
2 large green peppers cut into bite sized chunks (red and yellow peppers work well too and look gorgeous)
1 medium to large onion cut into chunks (same size as peppers and chicken)
1 package of fajita seasoning
1/4 tsp. vegetable oil
1/4 cup (or less) water
bamboo (or metal skewers)
Directions
1. Combine water, vegetable oil and fajita seasoning and divide into 2 shallow baking dishes, set aside.
2. Cut chicken into bit size pieces (small enough to cook quickly, but large enough to fit securely on the skewers) and add chicken to one of the shallow dishes, cover and refrigerate for at least 30 minutes.
3. Cut peppers and onions into bite size pieces (the same size as the chicken), add peppers and onions to the second shallow baking dish, cover and refrigerate for 30 minutes.
4. Heat grill to appropriate temperature, I usually put my food on when the grill has reached 350°. *If using bamboo skewers place skewers into warm water for at least 30 minutes before putting on the grill.*
5. Place chicken, peppers and onions on skewers, leaving room at the top and bottom to allow for easy pickup, alternating between the three until skewers are full.
6. Place skewers on the grill until chicken is cooked through. This usually takes just a couple of minutes per side.
7. You can either eat the chicken fajita kabobs on the skewer or slide the chicken and veggies off onto a warm flour tortilla and add your favorite toppings (this is the way I prefer).
There you have it…a super easy, somewhat quick, and completely delicious dinner that’s a yummy variation of a Mexican favorite! Bon Appétit !
Monday, August 19, 2013
The days are starting to get more comfortable and the nights are starting to require a jacket to stay outside after sunset, the kids are going back to school and I have visions of falling leaves and pumpkins already dancing in my head, that can only mean one thing—fall is coming—quickly! Fall is by far my favorite time of year and I love it for so many reasons, but one of the biggest is because of all of the yummy fall recipes that I can finally cook after a long summer of trying not to turn on the oven—and I can’t wait!

With the kiddos heading back to school, I’ll definitely have a little more time to put into my favorite recipes, but I’ll still without a doubt take some help from semi-homemade staples like Success boil-in-bag rice—it is one ingredient that I always have on hand for quick dinners. Success has long been my go-to brand for rice and I love the convenience of their boil-in-bag rice and with their new Thai Jasmine Rice, the only boil-in-bag rice currently available in this variety, I can experiment till my hearts content!
Serving up exotic foods at your dinner table is a fun way to experience another culture and replace weekly staples that have become a little boring. Success® Rice now makes it easy to bring the tastes of Thailand into your home! Transport your family to another country and treat them to the flavors of Asia.

Success Rice recently introduced Thai Jasmine Rice, the only boil-in-bag rice currently available in this variety. In just 10 minutes, you can enjoy an aromatic culinary experience for less than $3. Success Rice is also available in Basmati Rice, Whole Grain Brown Rice and White Rice varieties.
To make mealtime even simpler, visit iVillage.com for quick and easy recipes like Pineapple Thai Rice and Honey Ginger Baked Salmon (recipe is also below). Providing well-rounded, hearty meals for your family can be easy and so can other areas of your life – surf around iVillage to find tips and tricks for simplifying other tasks such as budgeting, home organizing and fitness.

1/3 cup orange juice
1/4 cup light soy sauce
1/3 cup honey
1 tsp. garlic, minced
1 tsp. fresh ginger root
4 (4 oz. each) salmon fillets
1 tsp. oil
1/2 cup red bell pepper, sliced
1/4 cup green onion, sliced
In a small saucepan combine orange juice, soy sauce, honey, garlic and ginger. Cook over medium heat for 1 minute. Reserve 2/3 cups marinade.
Place remaining marinade and salmon fillets into a plastic zippered bag and refrigerate for 15 minutes.
Remove salmon from marinade, place on aluminum foil-lined baking pan and bake for 20 minutes. Meanwhile, return 2/3 cup reserved marinade to small saucepan and simmer over medium-high heat for 5 minutes or until syrupy.
Heat oil in a medium skillet over medium heat. Sauté red bell pepper 2 minutes. Add peppers to cooked rice. Remove salmon from oven and serve over rice. Top with sauce and garnish with green onions.
Looks yummy—no? You can also snag a coupon for 50¢ off (at the top of the iVillage page) so you can save a little $ and serve up some Success Thai Jasmine Rice for dinner tonight! I also have some Success Thai Jasmine Rice to give away to one lucky MIBR reader so check out the Rafflecopter widget below for official rules and to enter!
a Rafflecopter giveaway Disclosure: I received the items above in order to facilitate my review, all opinions are my own!
With the kiddos heading back to school, I’ll definitely have a little more time to put into my favorite recipes, but I’ll still without a doubt take some help from semi-homemade staples like Success boil-in-bag rice—it is one ingredient that I always have on hand for quick dinners. Success has long been my go-to brand for rice and I love the convenience of their boil-in-bag rice and with their new Thai Jasmine Rice, the only boil-in-bag rice currently available in this variety, I can experiment till my hearts content!
Serving up exotic foods at your dinner table is a fun way to experience another culture and replace weekly staples that have become a little boring. Success® Rice now makes it easy to bring the tastes of Thailand into your home! Transport your family to another country and treat them to the flavors of Asia.

Success Rice recently introduced Thai Jasmine Rice, the only boil-in-bag rice currently available in this variety. In just 10 minutes, you can enjoy an aromatic culinary experience for less than $3. Success Rice is also available in Basmati Rice, Whole Grain Brown Rice and White Rice varieties.
To make mealtime even simpler, visit iVillage.com for quick and easy recipes like Pineapple Thai Rice and Honey Ginger Baked Salmon (recipe is also below). Providing well-rounded, hearty meals for your family can be easy and so can other areas of your life – surf around iVillage to find tips and tricks for simplifying other tasks such as budgeting, home organizing and fitness.
Honey-Ginger Baked Salmon with Jasmine Rice

Makes 4 Servings
Ingredients
2 bags Success Jasmine Rice1/3 cup orange juice
1/4 cup light soy sauce
1/3 cup honey
1 tsp. garlic, minced
1 tsp. fresh ginger root
4 (4 oz. each) salmon fillets
1 tsp. oil
1/2 cup red bell pepper, sliced
1/4 cup green onion, sliced
Directions
Prepare rice according to package directions. Heat oven to 375º.In a small saucepan combine orange juice, soy sauce, honey, garlic and ginger. Cook over medium heat for 1 minute. Reserve 2/3 cups marinade.
Place remaining marinade and salmon fillets into a plastic zippered bag and refrigerate for 15 minutes.
Remove salmon from marinade, place on aluminum foil-lined baking pan and bake for 20 minutes. Meanwhile, return 2/3 cup reserved marinade to small saucepan and simmer over medium-high heat for 5 minutes or until syrupy.
Heat oil in a medium skillet over medium heat. Sauté red bell pepper 2 minutes. Add peppers to cooked rice. Remove salmon from oven and serve over rice. Top with sauce and garnish with green onions.
Looks yummy—no? You can also snag a coupon for 50¢ off (at the top of the iVillage page) so you can save a little $ and serve up some Success Thai Jasmine Rice for dinner tonight! I also have some Success Thai Jasmine Rice to give away to one lucky MIBR reader so check out the Rafflecopter widget below for official rules and to enter!
a Rafflecopter giveaway Disclosure: I received the items above in order to facilitate my review, all opinions are my own!
Tuesday, July 23, 2013
One of my absolute favorite summer memories from when I was a child was playing outside with my friends, most of the time all day long until the street lights came on, and Bomb Pops. As an adult, I don’t do much playing outside, unless I’m chasing my little monsters, but I do still enjoy a Bomb Pop on a hot summer day.
A few nights ago I was having a serious craving for one of my favorite popsicles when I decided to try my hand at making a homemade version of a Bomb Pop. While I couldn’t get the consistency of mine to quite match the store bought version(I don’t know the word really to describe their consistency, aside from almost creamy), the taste was almost right on. And while I still definitely prefer the real thing, my Homemade Bomb Pop’s will definitely hit the spot the next time those late night cravings hit again.
You’ll Need:
1 package of Cherry Kool-Aid
1 package of Blue Raspberry Kool-Aid
1 package of Lemonade
Sugar
Popsicle molds (small paper cups and popsicle sticks work too)
Directions:
Prepare Kool-Aid according to package directions (I made all 3 flavors at the same time in different containers). Pour Blue Raspberry Kool-Aid into the bottom of popsicle molds (fill molds about 1/3 full with Blue Raspberry Flavor) and place in the freezer to freeze completely. (I should mention that this process does take a little time, but the results are awesome so it’s worth it and the kids had a lot of fun helping so I consider that a success).
Once blue layer has frozen, remove popsicle molds and pour 1/3 of the Lemonade over the Blue Raspberry layer and pop into freezer until Lemonade layer is almost frozen (with a thin layer of ice over the top) and then slowly add the Cherry Kool-Aid on top of the Lemonade mixture, filling the mold to the top. Place tops on the molds (you may have to push a little harder when inserting the tops (if they have sticks attached to the tops) to carefully break through the lemonade layer. Freeze popsicles until completely frozen (I chose to freeze them overnight) and serve.
TIP: If you’re popsicle molds are like mine, sitting them down in a bowl of hot water before trying to pull them out of the mold will help them release easily.
Enjoy!
A few nights ago I was having a serious craving for one of my favorite popsicles when I decided to try my hand at making a homemade version of a Bomb Pop. While I couldn’t get the consistency of mine to quite match the store bought version(I don’t know the word really to describe their consistency, aside from almost creamy), the taste was almost right on. And while I still definitely prefer the real thing, my Homemade Bomb Pop’s will definitely hit the spot the next time those late night cravings hit again.
Homemade Bomb Pops

You’ll Need:
1 package of Cherry Kool-Aid
1 package of Blue Raspberry Kool-Aid
1 package of Lemonade
Sugar
Popsicle molds (small paper cups and popsicle sticks work too)
Directions:
Prepare Kool-Aid according to package directions (I made all 3 flavors at the same time in different containers). Pour Blue Raspberry Kool-Aid into the bottom of popsicle molds (fill molds about 1/3 full with Blue Raspberry Flavor) and place in the freezer to freeze completely. (I should mention that this process does take a little time, but the results are awesome so it’s worth it and the kids had a lot of fun helping so I consider that a success).
Once blue layer has frozen, remove popsicle molds and pour 1/3 of the Lemonade over the Blue Raspberry layer and pop into freezer until Lemonade layer is almost frozen (with a thin layer of ice over the top) and then slowly add the Cherry Kool-Aid on top of the Lemonade mixture, filling the mold to the top. Place tops on the molds (you may have to push a little harder when inserting the tops (if they have sticks attached to the tops) to carefully break through the lemonade layer. Freeze popsicles until completely frozen (I chose to freeze them overnight) and serve.
TIP: If you’re popsicle molds are like mine, sitting them down in a bowl of hot water before trying to pull them out of the mold will help them release easily.
Enjoy!
Friday, July 19, 2013
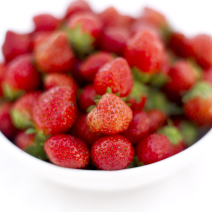
I don’t know how the weather is in your neck of the woods, but here in southern Ohio it’s HOT! With the heat index steady holding in the 100’s the past few days, it’s been enough to make me go in search of ways to beat the heat and stay cool, so when a pitch containing a recipe for popsicles landed in my inbox, I just knew I had to share. These popsicles are a little different than your average store-bought, high fructose corn syrup laden, popsicles though, they have tofu as one of the star ingredients! The recipe for these yummy Tofu and Berry Popsicles come from celebrity chefs Debi Mazar and Gabriele Corcos’ and sound as yummy as they look. You can find out a little more about the star ingredient in the Tofu and Berry popsicles and check out the recipe below…enjoy!
Made with House Foods Tofu, these popsicles are heaven sent in the hot heat! With the added benefits of soy and berries, this recipe brings together the sweet berries of the season along with the creamy texture of soft tofu. The celebrity couple explains, “Tofu is as versatile as sour cream, heavy cream, mayonnaise, cream cheese or ricotta and has allowed us to bring new life and a healthier component to many of our favorite recipes.” House Foods Tofu is non-GMO verified, certified kosher and gluten-free. Available in various firmness ranges – from soft to extra firm – along with an organic line of products sold nationwide.
Tofu and Berry Popsicles
Created by Debi Mazar & Gabriele Corcos, stars of Cooking Channel’s show Extra Virgin

INGREDIENTS:
1/2 package (7 oz) House Foods Tofu Soft
2 cups strawberries or other berries, hulled and sliced
1/2 cup super fine sugar
1 1/2 teaspoons pure vanilla extract
DIRECTIONS:
Add the berries to a bowl and toss with the sugar and the vanilla. Let sit out for 20 minutes so they become juicy.
Add fruit mixture to a blender or food processor and puree until smooth. Add the tofu and blend again until incorporated.
Divide the mixture into 4 popsicles molds. Freeze until firm, for about 4 hours.
Makes 6 Popsicles (3 ounces each)
I must admit, I’ve never been much of a tofu fan and to be honest I’m not even fully sure how to use tofu, but these popsicles might make me change my mind…I’ll let y’all now how they work out for us!
Tuesday, June 11, 2013
It’s summertime and that means camping trips and lots of hotdogs and marshmallows roasting over those roaring campfires. My kids love S’mores and as soon as the temperature climbs they start asking for them, but since I don’t always have a campfire handy they don’t get to enjoy them as much as I’m sure they’d like. A couple of weekends ago I was feeling a little adventurous so I decided to try to make a S’mores pie, but while searching online for a recipe I noticed that all of them I found required the use of an oven and that’s one kitchen appliance I like to stay far away from in the summer. So I decided to come up with my own no-bake S’mores Pie recipe…it was a huge hit with everyone! Let me know if you decide to try it, you won’t be sorry you did!
1 package (3.9 oz.) Chocolate Instant Pudding
1/2 cups cold milk
2.5 cups of miniature marshmallows
Hershey’s chocolate bar finely chopped or shaved to garnish pie (optional)
No-Bake S’mores Pie

Ingredients
1 9 inch graham cracker pie crust1 package (3.9 oz.) Chocolate Instant Pudding
1/2 cups cold milk
2.5 cups of miniature marshmallows
Hershey’s chocolate bar finely chopped or shaved to garnish pie (optional)
Directions
Prepare pudding according to package directions for pies and pour into graham cracker crust. ( didn’t have a graham cracker crust so I used graham crackers, a pinch of sugar and butter and made my own…super simple). Refrigerate pie for at least 2 hours to allow pudding to set. Once pudding has set , arrange marshmallows on top of the pie and place pie under broiler just until the tops of the marshmallows begin to brown. Remove pie from oven and sprinkle with chocolate. Serve immediately. Leftovers can be refrigerated, but this pie is so much yummier when the marshmallows are ooey, gooey!Tuesday, February 19, 2013
I’ve never been much of a coffee drinker, in fact, the older I get, the less inclined I am to drink it, but there’s just something about iced coffee that I can’t seem to get enough of. My husband, who loves coffee and drinks it daily, has used International Delights creamer for years and on a recent trip to the grocery store he discovered International Delights Light Iced Coffee—and that’s where I come in. As I mentioned above, I love me some iced coffee, but since I’ve been trying to watch what I eat and drink, I sometimes have to pass up my favorite iced coffee, for water (and I don’t love water nearly as much), but since we discovered International Delights Light Iced Coffee, I’m a very happy girl!
I have to be honest with you, watching what I eat and drink can be very annoying, not to mention boring on the palate, but I love when I can take an ingredient, in this case iced coffee, and turn it into something that tastes great, without feeling guilty after eating or drinking it and that’s exactly what I did with International Delights Light Iced Coffee. Since one of my favorite ways to indulge is by having a milkshake, I thought I’d try my hand at creating a great tasting, simple, less guilt ridden version of one of my favorites, a chocolate mocha milkshake. While there are many, many recipes for this milkshake that I love, my favorite is the BBC Blog, Good Food version of the Mocha Milkshake. Though I do love the recipe, I wanted to make it easier than the original, which requires you to boil milk and then infuse it with chocolate and mocha, but also easier on my waist line—the outcome was a yummy play on the Good Food original, using International Delights Light Iced Coffee of course.

1.5 to 2 cups International Delights Light Iced Coffee (Mocha Flavor)
4 scoops of light or fat-free vanilla ice cream
2 tsp. fat free chocolate syrup (plus additional for garnish—if desired)
Fat-free or low fat whipped cream (optional)
Directions
Put 1.5 cups International Delights Light Iced Coffee, 4 scoops of light vanilla ice cream and 2 tsps. chocolate syrup in blender and pulse until smooth (more ice cream or iced coffee may be added to reach the consistency that’s right for you). Pour milkshake into ice cold glass, garnish with chocolate syrup and whipped cream as desired. ENJOY!
In just a few minutes, with only 4 ingredients, you can have a delicious, more health conscious version of an old favorite…in my book, that rocks! So next time you’re in the mood for iced coffee, make sure to check out International Delights Light Iced Coffee and save your waistline and your pocketbook big!
With less calories and less sugar, International Delight Light Iced Coffee lets you enjoy MORE of what you love! For more fun ways to break up your day, visit ID's new online games today for a chance to win sweet prizes and coupons to use on your next purchase!
This is a sponsored conversation written by me on behalf of International Delight. The opinions and text are all mine.
I have to be honest with you, watching what I eat and drink can be very annoying, not to mention boring on the palate, but I love when I can take an ingredient, in this case iced coffee, and turn it into something that tastes great, without feeling guilty after eating or drinking it and that’s exactly what I did with International Delights Light Iced Coffee. Since one of my favorite ways to indulge is by having a milkshake, I thought I’d try my hand at creating a great tasting, simple, less guilt ridden version of one of my favorites, a chocolate mocha milkshake. While there are many, many recipes for this milkshake that I love, my favorite is the BBC Blog, Good Food version of the Mocha Milkshake. Though I do love the recipe, I wanted to make it easier than the original, which requires you to boil milk and then infuse it with chocolate and mocha, but also easier on my waist line—the outcome was a yummy play on the Good Food original, using International Delights Light Iced Coffee of course.
International Delights Light Iced Coffee Mocha Milkshake
4 scoops of light or fat-free vanilla ice cream
2 tsp. fat free chocolate syrup (plus additional for garnish—if desired)
Fat-free or low fat whipped cream (optional)
Directions
Put 1.5 cups International Delights Light Iced Coffee, 4 scoops of light vanilla ice cream and 2 tsps. chocolate syrup in blender and pulse until smooth (more ice cream or iced coffee may be added to reach the consistency that’s right for you). Pour milkshake into ice cold glass, garnish with chocolate syrup and whipped cream as desired. ENJOY!
In just a few minutes, with only 4 ingredients, you can have a delicious, more health conscious version of an old favorite…in my book, that rocks! So next time you’re in the mood for iced coffee, make sure to check out International Delights Light Iced Coffee and save your waistline and your pocketbook big!
With less calories and less sugar, International Delight Light Iced Coffee lets you enjoy MORE of what you love! For more fun ways to break up your day, visit ID's new online games today for a chance to win sweet prizes and coupons to use on your next purchase!
This is a sponsored conversation written by me on behalf of International Delight. The opinions and text are all mine.
Wednesday, January 30, 2013
I don’t know about you, but I’m definitely excited about the Big Game this weekend. In the past I haven’t really cared too much about the Super Bowl, but ever since I adopted the 49ers as my favorite team and they made it to the Super Bowl, I’ve been looking forward to Sunday February 3rd! And while I will be watching the game on Sunday a lot more closely than I have Super Bowls past, Super Bowl Sunday is still all about spending time with friends and family and great food!

On Super Bowl Sunday I usually go all out, spending all day cooking so that we can all get comfy on the couch and enjoy the game and this Sunday will be no exception. Our usual Super Bowl menu includes wings, several different kinds of dips, egg rolls, pizza and lots of other super yummy Super Bowl snacks. This year instead of our usual homemade pizza, I thought I’d try something a little different with Pillsbury Artisan Pizza Crust with Whole Grain. When I make pizza I usually end up spending a whole lot of time in the kitchen making pizza dough and to be quite honest, the finished product doesn’t always come out as I’d like it to, that’s why I love the idea of taking a little help from Pillsbury and getting some much needed whole grain in my family’s diet, it’s a win—win!
Pillsbury Artisan Pizza Crust with Whole Grain is the perfect option for that M.V.P. performance. Just add your favorite, crowd-pleasing ingredients and in minutes you’ll have a fan favorite pizza that everyone will enjoy!
Check out some of our recipe ideas on our website: http://bit.ly/VleqXy You can also can also download a printable coupon for $1.50 off one package of the new Pillsbury Artisan Pizza Crust with Whole Grain. Make sure you follow @Pillsbury on Twitter and Like Pillsbury on Facebook!
One very lucky MIBR reader is going to win a Pillsbury Artisan Pizza Crust with Whole Grain Prize Pack…details on how to enter below!

WIN IT!
One (1) Misadventures in Baby Raising reader will win a Pillsbury Artisan Pizza Crust with Whole Grain Prize Pack that includes:
FREE coupon for Pillsbury Artisan Pizza Crust with Whole Grain
Football cutting board
Pizza pan
Pizza cutter
Details on how to enter and official rules, below using the Rafflecopter widget!
a Rafflecopter giveaway
Disclosure: The product, gift pack, information, and additional sample have been provided by Pillsbury through MyBlogSpark.

On Super Bowl Sunday I usually go all out, spending all day cooking so that we can all get comfy on the couch and enjoy the game and this Sunday will be no exception. Our usual Super Bowl menu includes wings, several different kinds of dips, egg rolls, pizza and lots of other super yummy Super Bowl snacks. This year instead of our usual homemade pizza, I thought I’d try something a little different with Pillsbury Artisan Pizza Crust with Whole Grain. When I make pizza I usually end up spending a whole lot of time in the kitchen making pizza dough and to be quite honest, the finished product doesn’t always come out as I’d like it to, that’s why I love the idea of taking a little help from Pillsbury and getting some much needed whole grain in my family’s diet, it’s a win—win!
Pillsbury Artisan Pizza Crust with Whole Grain is the perfect option for that M.V.P. performance. Just add your favorite, crowd-pleasing ingredients and in minutes you’ll have a fan favorite pizza that everyone will enjoy!
- With 16 grams of whole grain per serving, it’s a great Big Game option
- Now available in the refrigerated section of your local grocery store
Check out some of our recipe ideas on our website: http://bit.ly/VleqXy You can also can also download a printable coupon for $1.50 off one package of the new Pillsbury Artisan Pizza Crust with Whole Grain. Make sure you follow @Pillsbury on Twitter and Like Pillsbury on Facebook!
One very lucky MIBR reader is going to win a Pillsbury Artisan Pizza Crust with Whole Grain Prize Pack…details on how to enter below!

WIN IT!
One (1) Misadventures in Baby Raising reader will win a Pillsbury Artisan Pizza Crust with Whole Grain Prize Pack that includes:
FREE coupon for Pillsbury Artisan Pizza Crust with Whole Grain
Football cutting board
Pizza pan
Pizza cutter
Details on how to enter and official rules, below using the Rafflecopter widget!
a Rafflecopter giveaway
Disclosure: The product, gift pack, information, and additional sample have been provided by Pillsbury through MyBlogSpark.
Friday, January 25, 2013

I’ve never been much of a football fan, in fact, until this past season, I dreaded Sundays and Mondays and every other day/night that football dominated my television. My husband plays fantasy football every year, so in addition to supporting his favorite team (the Cincinnati Bengals) he also “had to watch” every single football game the entire season, normally this behavior would drive me crazy, but this year that behavior helped me find a team I could finally get behind and dare I say, actually turn me into a football fan. Who knew several weeks ago when I discovered how much I adore the San Francisco 49ers (I know, it’s really weird for a Cincinnati girl to adopt a team all the way across the country as her favorite, but what are you gonna do) and their completely awesome quarterback Colin Kaepernick, that my team ( it feels weird saying that) would actually end up playing in Super Bowl XLVII??? I have to say, it’s rather exciting for me! Though I’ve never been much of a football fan, the Super Bowl is the one game that we always watch and that usually means lots of family, friends and good food!
I had the opportunity recently to work with Del Monte on a fun campaign centering around their Petite Cut Diced Tomatoes (a product that I use all the time) to create some great recipes for the big game and I couldn’t wait to get started! Del Monte sent me two new varieties of Petite Cut Diced Tomatoes to incorporate into my game day dishes: Del Monte® Petite Cut® Diced Tomatoes with Green Chilies and Del Monte® Petite Cut® Diced Tomatoes with Chipotle Chilies and I knew exactly how I was going to use them.

When it comes to cooking for the big game, it’s usually a mixture of everyone’s favorite snack foods (chips and dip, pigs in a blanket, egg rolls) and something more substantial like quesadillas or chili or both. Since chili is usually on my game day menu I decided to start there by adding a can of Del Monte® Petite Cut® Diced Tomatoes with Green Chilies to the recipe and the results were pretty darn good if I do say so myself. My usual chili is rather mild since I have two little ones who can’t tolerate spicy foods like the rest of us can, but the addition of the tomatoes with green chilies only added a slight kick and a great flavor, I think I may have to add them from now on! Chicken Quesadilla are my specialty, I make them at least a couple of times a month for our family, they’re super easy, so yummy and don’t take too much time so they’re the perfect week night meal for us, but they are also great to serve for guests as well—they’re yummy. I thought that taking my original quesadilla recipe and tweaking it a bit to include the Del Monte® Petite Cut® Diced Tomatoes with Chipotle Chilies could work well and I was definitely right. Check out my Chicken Quesadilla recipe below…you’ll want to pin this one!
Kickin’ Chipotle Chicken Quesadillas

Serves up to 10 people
Ingredients
2.5 lbs boneless, skinless chicken breast (cut into bite size pieces)10 Azteca flour tortillas
4 oz. cream cheese softened
1- 14.5 oz can Del Monte® Petite Cut® Diced Tomatoes with Chipotle Chilies drained
1 packet Chicken Taco seasoning
1- 8oz. package of shredded mild cheddar or fiesta blend cheese
1- 4oz. can green chilies
Directions
1. Cut chicken breasts into bite-size pieces and cook in lightly oiled non-stick pan until cooked through. Add chicken taco seasoning to diced chicken and cook according to package directions.2. Transfer chicken to medium mixing bowl and add cream cheese, tomatoes, and half of the shredded cheese. Mix until well incorporated.
3. Take 1 flour tortilla and add 2 TBS of the chicken mixture to half of the tortilla and spread mixture to cover. Add additional cheddar cheese (if desired), fold tortilla in half and cook in an lightly oiled (I used cooking spray) non-stick pan and allow quesadilla to cook until cheese in melted and both sides are brown.
4. Allow quesadilla to cool before slicing into 4 equal pieces (a pizza cutter does this beautifully).
5. Serve and enjoy!
This recipe is super simple and though the Del Monte® Petite Cut® Diced Tomatoes with Chipotle Chilies were different than we are used to, I think they worked great in this dish and everyone seemed to agree. I can’t wait until Super Bowl Sunday to make both of these dishes for all of our party guests.
In addition to having two great new diced tomato varieties, Del Monte is helping to inspire a little creativity in the kitchen by kicking off their Southwestern Tomato Kick-Off Sweepstakes and this is one sweepstakes you are definitely going to want to check out! As part of the sweepstakes you can share tips and recipes featuring the new Del Monte Southwestern-Style Petite Cut® Diced Tomato varieties. One lucky winner will take home an exciting entertainment package including: a Sony® 55” LED TV, Bose® home theater system and Sony® Blu-ray player (ARV $4,779.00 USD) so make sure you head over to the Del Monte website and look at the official rules!
You can keep up with the Southwestern Tomato Kick-Off Sweepstakes by Liking the Del Monte on Facebook, Following Del Monte on Pinterest and Following @DelMonteFoods on Twitter! You can also check out “Del Monte Southwestern Tomato Kick-Off” Pinterest board for some great recipes featuring Del Monte’s new diced tomato varieties, by Hungry Girl Lisa Lillien !
WIN IT!
I have great news for one MIBR reader, I have an awesome Del Monte Gift pack including (1) Can Del Monte® Petite Cut® Diced Tomatoes with Green Chilies, (1) can Del Monte® Petite Cut® Diced Tomatoes with Chipotle Chilies and a $25 Visa gift card! Details on how to enter and official rules can be found using the Rafflecopter widget below!
a Rafflecopter giveaway
Disclosure: “The Del Monte products, information and two gift packs have been provided by Del Monte.”
Thursday, November 8, 2012
I mentioned my love for all things Christmas yesterday and nothing makes me happier this time of year than getting in the kitchen and baking up some sweet treats for family and friends. Though I have a few favorites that always make an appearance around the holidays, I’m always more than willing to try something new.
Recently I received a magazine that I just know is going to make my holiday baking so much more interesting and yummy than years past…Holiday Food Gifts to Make! In addition to recipes for cookies, candies, snack mixes, crafts and so much more, there are also a ton of great ideas to turn those yummy creations into gifts that family and friends will love!
Deck your halls with…Holiday Food Gifts to Make!
Take a new spin on old holiday traditions this winter season with creative ideas from Good Housekeeping, Redbook, and Country Living! You’ll find fun and merry ways to deck your halls with affordable gift basket arrangements or recipes to whip up the perfect batch of Christmas cookies. You’ll also find a special collection of super-easy, super-quick presents you can literally make in minutes, as well as an entire section dedicated to new ways to wrap your presents using surprising containers and materials.
What’s inside?
I can’t wait to get started cooking…make sure you check out Holiday Food Gifts to Make in our 2012 Holiday Gift Guide!
Disclosure: I received the product mentioned above in order to facilitate my review…all opinions are 100% my own!
Recently I received a magazine that I just know is going to make my holiday baking so much more interesting and yummy than years past…Holiday Food Gifts to Make! In addition to recipes for cookies, candies, snack mixes, crafts and so much more, there are also a ton of great ideas to turn those yummy creations into gifts that family and friends will love!

Deck your halls with…Holiday Food Gifts to Make!
Take a new spin on old holiday traditions this winter season with creative ideas from Good Housekeeping, Redbook, and Country Living! You’ll find fun and merry ways to deck your halls with affordable gift basket arrangements or recipes to whip up the perfect batch of Christmas cookies. You’ll also find a special collection of super-easy, super-quick presents you can literally make in minutes, as well as an entire section dedicated to new ways to wrap your presents using surprising containers and materials.
What’s inside?
- Sweet and savory recipes for gingerbread cookies, muffins, jams, gourmet breads, and much more
- Adorable ideas for creating easy and one-of-a-kind presents for your loved ones
- Tips on how to make fragrant soaps and scrubs using everyday ingredients in your kitchen
- Super-cute home decorations like homemade fringed pillows or cozies for your holiday silverware
I can’t wait to get started cooking…make sure you check out Holiday Food Gifts to Make in our 2012 Holiday Gift Guide!
Disclosure: I received the product mentioned above in order to facilitate my review…all opinions are 100% my own!
Thursday, September 27, 2012
One of the hardest decisions that I have to make on a daily basis is what to have for dinner, most of the time it’s not even an issue of “what do I want?” it’s more of an “I’m not even sure where to start” kinda thing—I’m sure I’m not alone in this! Being as busy as I am most days, I usually take all the help I can get when it comes to what to have for dinner and nothing has been more help lately than Progresso Recipe Starters.

Progresso Recipe Starters sauces are available in five flavorful varieties that can each be used as a starter to create numerous home-cooked meals. For added inspiration, Progresso created 80 recipes utilizing this new line of cooking sauces that can be found on Progresso.com/RecipeStarters. Many of these recipes are classic family favorites, such as Bacon Mac n’ Cheese, Chicken Pot Pie and Chicken Parmesan, and utilize ingredients your family may already have on-hand. In addition, all of the recipes on the site include a Rate and Review feature, so we encourage you to leave a rating and review of your own, in which you can even include a link back to your blog post about that recipe! Look for Progresso Recipe Starters in the soup aisles!
Inspired by the five “Mother” Sauces that form the basis of classical French cooking, including Béchamel, Velouté, Tomato, Espagnole and Hollandaise, Recipe Starters use a variety of ingredients and the best techniques to make sure you have delicious options to take on the school days dinner dilemma. The five varieties are:
I received two different varieties of Progresso Recipe Starters; Creamy Parmesan Basil and Creamy Roasted Garlic with Chicken Stock as well as a few other goodies, including a very helpful recipe booklet, to help me turn a busy week night meal into something special. Since everyone in the house loves chicken and it seems to be the one protein I have the most trouble being creative with,I decided to try the Crispy Garlic-Parmesan Chicken—it was a big hit with everyone and I’ll definitely be adding it to my monthly meal rotation.
If you can’t wait to try Progresso Recipe Starters you can go here and print a coupon for $.65 off the purchase of 1 can of Progresso® Recipe Starters Cooking Sauce. Make sure you Like Progresso on Facebook while you’re at it!
So, how would y’all like the chance to win a Progresso Recipe Starter prize pack full of all of the goodies below? Awesome, that’s what I thought! Prize Pack includes:

Two cans of Progresso Recipe Starters
$10 Gift Card to purchase your recipe ingredients
Progresso Recipe Starters recipe book, including 5 recipes to get you started
Baking dish
Measuring Cups
Sauce Scraper
WIN IT!
One Misadventures in Baby Raising reader will win a Progresso Recipe Starters Prize Pack (including all of the items listed above). Please check out the Rafflecopter widget below for official rules and to enter!
a Rafflecopter giveaway
Disclosure: I received the items listed above as well as the information for this post from Progresso through MyBlogSpark…all opinions are my own.
Progresso Recipe Starters sauces are available in five flavorful varieties that can each be used as a starter to create numerous home-cooked meals. For added inspiration, Progresso created 80 recipes utilizing this new line of cooking sauces that can be found on Progresso.com/RecipeStarters. Many of these recipes are classic family favorites, such as Bacon Mac n’ Cheese, Chicken Pot Pie and Chicken Parmesan, and utilize ingredients your family may already have on-hand. In addition, all of the recipes on the site include a Rate and Review feature, so we encourage you to leave a rating and review of your own, in which you can even include a link back to your blog post about that recipe! Look for Progresso Recipe Starters in the soup aisles!
Inspired by the five “Mother” Sauces that form the basis of classical French cooking, including Béchamel, Velouté, Tomato, Espagnole and Hollandaise, Recipe Starters use a variety of ingredients and the best techniques to make sure you have delicious options to take on the school days dinner dilemma. The five varieties are:
- Creamy Parmesan Basil: This creamy, full-bodied and indulgent sauce that was inspired by alfredo and creamy pesto sauces can be used to make dishes such as Crispy Garlic-Parmesan Chicken, Creamy Chicken Alfredo, Basil Chicken Ravioli Carbonara and Basil Chicken Thai Noodle
- Creamy Roasted Garlic with Chicken Stock: With caramelized, roasted chicken broth, garlic and a touch of cream, this stock is perfect for dishes such as Creamy Lemon Chicken, Chicken Pot Pie and Chicken Enchiladas
- Fire Roasted Tomato: A medium-thick tomato sauce, accompanied by flavors of roasted, caramelized tomatoes, oregano and bell peppers, which can be used as a great way to begin creating Pulled Chicken Sandwiches, Easy Weeknight Chicken Parmesan, Cheese-stuffed Mini Meat Loaves and Mole Tacos
- Creamy Portabella Mushroom: Creamy and highly indulgent, this smooth sauce is rich with sautéed Portabella mushrooms, giving you any easy way to start delicious dishes like Easy Weeknight Beef Stroganoff, Steak and Mushroom Sandwich and Tetrazzini
- Creamy Three Cheese: Rich and creamy with a blend of yellow and white cheeses, and a savory background of chicken stock, onion, garlic and cracked pepper, this is a great way to satisfy cheese lovers with Easy Weeknight Bacon Mac & Cheese, Twice-Baked Potato Pizza and Cheesy Egg Breakfast Tacos
-

I received two different varieties of Progresso Recipe Starters; Creamy Parmesan Basil and Creamy Roasted Garlic with Chicken Stock as well as a few other goodies, including a very helpful recipe booklet, to help me turn a busy week night meal into something special. Since everyone in the house loves chicken and it seems to be the one protein I have the most trouble being creative with,I decided to try the Crispy Garlic-Parmesan Chicken—it was a big hit with everyone and I’ll definitely be adding it to my monthly meal rotation.
If you can’t wait to try Progresso Recipe Starters you can go here and print a coupon for $.65 off the purchase of 1 can of Progresso® Recipe Starters Cooking Sauce. Make sure you Like Progresso on Facebook while you’re at it!
So, how would y’all like the chance to win a Progresso Recipe Starter prize pack full of all of the goodies below? Awesome, that’s what I thought! Prize Pack includes:

WIN IT!
One Misadventures in Baby Raising reader will win a Progresso Recipe Starters Prize Pack (including all of the items listed above). Please check out the Rafflecopter widget below for official rules and to enter!
a Rafflecopter giveaway
Disclosure: I received the items listed above as well as the information for this post from Progresso through MyBlogSpark…all opinions are my own.
Tuesday, August 28, 2012
Celebrate the newfound freedom that came with those 3 beautiful words…back-to-school with a cocktail compliments of Mommy Mixology!
I cannot tell a lie, I was beyond psyched on the first day of school, I mean after a summer with 5 (sometimes 6) kiddos to take care of I kinda think I deserved a break…right ladies?
I know you’re thinking, “So what is Mommy Mixology and what does it have to do with me?”. Well, Mommy Mixology just so happens to be a book filled with parenting mishaps turned into the inspiration for playful cocktail recipes that will make you laugh and shake your head in agreement all at once. With over 60 recipes and tons of great photos, author Janet Frongillo uses her own experiences raising 3 boys as the inspiration for the fun and funny cocktails in Mommy Mixology.

I love this book, not only is it funny, it also has some pretty great cocktail recipes…here are a few of my favorites…
* You think your house is all baby proofed, when Houdini baby proves he’s already faster and trickier than you…you definitely need the Houdini Hurricane.
* When your toddler digs in his heels and comes back with “NO!” 367 times, shake it off with a refreshing No!Jito!
* When your 3 year old pushes down his Pull-Ups and learns the difference between boys and girls, sit back and laugh with a Penis Colada.
Now just try and tell met that you’re not dying for a Penis Colada right now…that’s what I thought. While the cocktails are all fantastic, the real winner is the cocktail names and the stories behind them. The book follows a child’s journey from conception to kindergarten and makes you laugh at all of the terrible times you had while your little one was growing up in.
Looking for a new drink to try for ladies night? Maybe you just need a break and a drink—or 5? Whatever the reason, if you’re looking for a great cocktail recipe book then you have to try this one—it won’t disappoint!
BUY IT!
You can pick up Mommy Mixology: A Cocktail for Every Calamity on Amazon!
Disclosure: I received the products mentioned above in order to facilitate my review…all opinions are 100% my own!
Thursday, August 23, 2012
Every Mom knows that the most important part of a school day, is the after school snack. As soon as my kiddos come in the door from school they head straight to the kitchen to raid the refrigerator and it turns out that the Obama girls like their afterschool snacks as well—check out some of the Obama girls favorite afterschool snacks from White House Chef Sam Kass. These snack recipes can also be found in the first ever Food Network Magazine Kids, which is a mini-mag attached to Food Network Magazine’s September issue.

About Food Network Magazine Kids:
Aimed at parents, Food Network Magazine Kids takes an accessible approach to cooking kid-friendly meals and getting kids involved in the kitchen. Other features include mix-and-match chocolate cookies, Food Network stars’ favorite apple snacks and switched-up dinner classics like spaghetti burgers and spaghetti and burger meatballs.
I thought it would be fun to share some of these healthy and super yummy recipes with all of you…enjoy!
Sam Kass, a White House chef and Michelle Obama’s adviser for her Let’s Move! program, says that the White House is always stocked with fruit in case Sasha or Malia needs a bite. But Kass knows that kids don’t always come home from school begging for healthful stuff, so he offered up these smart swaps for some favorite after-school treats.

Chop 1/2 pound dark chocolate. Microwave three-quarters of the chocolate in 30-second intervals, stirring, until mostly melted. Stir in the remaining chocolate until smooth. Drizzle over mini pretzels or apple slices and let harden.
“There is no substitution for chocolate!” Kass says. “The key is moderation.”
Instead of packaged peanut butter crackers, make almond butter.

Blend 2 cups almonds and 2 large pinches kosher salt in a food processor for 5 minutes. Pulse in 3 tablespoons vegetable oil and 2 teaspoons honey. Spread on whole-wheat crackers.
“Almond butter is really simple to make and fun to do with kids,” Kass says.
I
Preheat the oven to 350 degrees F. Remove the stems from 1 bunch kale and tear the leaves into bite-size pieces. Toss with 1 tablespoon olive oil and 1/2 teaspoon salt. Bake until crisp, about 30 minutes.
“Kale chips are great,” Kass says. “Kids don’t expect them to taste like potato chips, but they do.”
Wednesday, February 1, 2012
While mac and cheese is adored by many, homemade mac and cheese can be time-consuming and rather tedious. If your schedule doesn’t allow for much time in the kitchen, try these five easy macaroni and cheese recipes—they can be made in no time. And the best part is no one will ever notice they came from a box. With a few tweaks and additions here and there, you can provide gourmet goodness without putting forth the ‘gourmet’ effort.

Old-Fashioned Baked Mac & Cheese
The recipe may be ‘old fashioned,’ but this is one of those macaroni and cheese recipes that never gets old. The diced tomatoes, Italian dressing and bread crumbs provide a delightful boost of flavor to an already-delicious baked mac and cheese.
Servings: 4
Ingredients
1 pkg. (7-1/4 oz.) macaroni & cheese dinner
1/4 cup milk
1 can (14-1/2 oz.) diced tomatoes, drained
1/4 cup Zesty Italian dressing
2 Tbsp. butter, melted
1 cup bread crumbs
Directions
Heat oven to 375°F.
Add macaroni to large saucepan boiling water; cook 6 minutes or until tender. Drain. Stir in milk and cheese sauce mix.
Pour into greased 8-inch square baking dish. Mix tomatoes and dressing. Top macaroni mixture with tomato mixture. Drizzle butter over bread crumbs; toss with fork. Sprinkle over tomatoes.
Bake 15 minutes or until heated through and crumbs are golden.
Memphis-Style BBQ Mac & Cheese
Memphis, Tennessee is known for many things, including Elvis Presley and Graceland, the Memphis Grizzlies and southern barbecue. But this tasty barbecue mac and cheese recipe (Memphis style, of course) is certainly worth a mention also. Hide your grandma—she might get slapped!
Servings: 5
Ingredients
1 pkg. (14 oz.) deluxe macaroni & cheese dinner
1/2 lb. lean ground beef
1/2 cup finely chopped onions
2 cloves garlic, finely chopped
1/2 cup Memphis-style barbecue sauce
2 slices bacon, cooked, crumbled
1 green onion, sliced
Directions
Cook macaroni as directed on package. Meanwhile, brown meat with onions and garlic in large skillet; drain.
Add macaroni, cheese Sauce and barbecue sauce to meat mixture in skillet; stir. Cook 2 to 3 minutes or until heated through, stirring occasionally.
Top with bacon and onions.
Chipotle Chile Mac and Cheese
Chilly outside? Turn up the heat with Chipotle Chile Mac and Cheese. This is one of those macaroni and cheese recipes that disappears in no time, especially if you are cooking for hungry teenage boys. Make plenty of servings and enjoy leftovers the following night (if you’re lucky enough!).
Servings: 6
Ingredients
1 pkg. (14 oz.) Kraft Deluxe Macaroni & Sharp Cheddar Cheese Sauce
1 lb. lean ground beef
1 onion, finely chopped
1 red bell pepper, finely chopped
1 canned chipotle pepper in adobo sauce, minced
4 green onions, thinly sliced
3/4 cup shredded cheddar cheese
6 Ritz crackers, coarsely crushed (about 1/4 cup)
Directions
Heat oven to 400ºF.
Prepare dinner as directed on package. Meanwhile, brown beef with onion and bell pepper in large skillet over medium-high heat 5 minutes. Drain.
Add meat mixture to prepared dinner and stir in chipotle pepper. Spoon into greased 2-qt. casserole or baking dish. Top with green onions, cheese and cracker crumbs.
Bake 15 minutes or until mixture is hot.
All-in-One Veggie Mac and Cheese
Most parents are trying to find creative ways of sneaking vegetables into their children’s diet, and this is the perfect solution. The creaminess in this macaroni and cheese recipe overshadows the mixed vegetables. Kids will think they are getting away with eating their veggies, and grown-ups will think it’s gourmet—a win-win situation!
Servings: 8
Ingredients
1-1/2 cups water
1 cup milk
1 pkg. (14 oz.) deluxe macaroni & cheese dinner
3 cups frozen mixed vegetables
1 Tbsp. butter
Directions
Bring water and milk just to boil in large saucepan on medium heat. Add macaroni; stir. Reduce heat to low; simmer 6 minutes or until macaroni is tender.
Stir in vegetables; cover. Simmer 3 minutes until liquid is almost absorbed and vegetables are heated through, stirring occasionally.
Add cheese sauce and butter; stir until well blended.
Mac & Cheese-Stuffed Poblanos
Stuffed vegetables serve as wonderful appetizers, side dishes or main entrées, and give new meaning to gourmet macaroni and cheese recipes. Fool your family into thinking you’ve spent hours making these mac and cheese-stuffed poblano peppers—they won’t know the difference! For those who like added zing, keep hot sauce close by.
Servings: 8
Ingredients
2 pkg. (7-1/4 oz. each) macaroni & cheese dinner
3 hot dogs, chopped
1-1/2 cups Mexican-style shredded four cheese, divided
8 poblano chiles, roasted, peeled and seeded
1/2 tsp. paprika
Directions
Heat oven to 350º F.
Prepare dinners as directed on package. Stir in hot dogs and 1 cup cheese.
Fill chilies with dinner mixture; place, filled-sides up, in single layer in shallow baking dish sprayed with cooking spray. Top with remaining cheese and paprika.
Bake 15 minutes or until cheese is melted and peppers are heated through.
Kick It Up a Notch!
While mac and cheese recipes have remained a staple in recipe boxes for generations, many cooks are creating new variations to old-style dishes. The following ingredients are just a few ways you can spruce up this American classic.
Meats: Bacon,Brisket, Chicken, Chorizo, Ground Beef
Vegetables: Jalapeño Pepper, Poblano Pepper, Wild Mushrooms, Artichoke Hearts, Sun-Dried Tomatoes, Diced Tomatoes, Spinach, Broccoli, Scallions, Corn
Cheeses: Gouda, Blue Cheese, Monterey Jack, Pecorino Romano, Manchego, Asiago, Fontina, Swiss, Goat Cheese, Parmesan
Enjoy the creamy goodness of these gourmet-like macaroni and cheese recipes sans all the fuss. Just because you’re busy doesn’t mean you can’t cook up a fantastic mac and cheese dish.
Friday, January 20, 2012
One of my family’s favorite meals is pizza; I’m convinced that all four of my children would be content with pizza for breakfast, lunch and dinner 7 days a week—yes, it’s that major!
While I do enjoy pizza, in moderation, I get bored with the same old pizza and when that happens there’s only one solution—I make homemade calzones! And they are Ah-Mazing!
Since I’m sure I’m not the only Mom who gets tired of the same old pizza, I thought I’d share this simple recipe so you can try it at your house! I will say that while the recipe is simple. it does take a little time if you’re using homemade pizza crust (which I was) I decided that for simplicity’s sake I would recommend refrigerated pizza crust in place of homemade!
Homemade Supreme Calzones
Yield: 2 Large Calzones

Ingredients
2 ready to use refrigerated pizza crusts
1 pound of lean ground beef
1 package pepperoni
1 jar pizza sauce (I prefer and always use Ragu traditional pasta sauce in place of pizza sauce)
1 large green pepper
1 medium onion
1 8 oz. package of shredded mozzarella cheese
1/4 cup grated parmesan cheese
1 stick of butter
2 cloves of garlic minced (or 1/2 to 1 tsp. garlic powder)
olive oil spray
Directions
1. Preheat oven to 475 degrees (heat oven according to pizza crust packaging).
2. Crumble and brown ground beef until cooked through. Drain any fat from meat and set aside.
3. Melt butter on low, once butter had melted add garlic powder or minced garlic (whichever you prefer).
4. Roll out pizza dough onto a greased pizza pan.
5. Spoon 1-2 tablespoons of pizza (or pasta sauce) onto pizza dough, spread pizza sauce onto half of the pizza crust.
6. Spoon half of the ground beef onto pizza crust, spread ground beef evenly on top of the pizza sauce.
7. Layer pepperoni on top of ground beef. Repeat layering with green pepper, onion, parmesan and mozzarella.

8. Once all toppings are added, fold empty side of crust overtop of the filling side. Using your fingers (a fork works as well) crimp the edges of the pizza dough together, making sure to seal all opening. With a knife cut two small slits in the top of pizza crust (to allow for venting of steam).
9. Take butter/garlic mixture and brush over the top and edges of calzone.
10. Bake in a 475 degree oven until golden brown.
Each calzone can be cut into thirds, topped with remaining parmesan and served with remaining pizza sauce!

Saturday, December 10, 2011
I am the queen of semi-homemade cooking—yeah, I know, you thought it was Sandra Lee, but you thought wrong!
I happen to be particularly awful at baking and/or candy making—I just suck at it to be honest!
I do however, love baking cookies and making candy with my kiddos for the holidays and that’s where my semi-homemade cooking skills take center stage!
Last year I shared a few of my favorite semi-homemade holiday treats—Potato Candy (made with leftover homemade mashed potatoes) and Reindeer Chocolate Truffles (made using store bought truffles) so this year I thought I’d share another of my favorite holiday treats with all of you—Peanut Butter Blossoms…these are perfect Santa snacks!

Semi-Homemade Peanut Butter Blossoms
Yield: 2 dozen cookies
Ingredients
2 snack pack size packages Betty Crocker Peanut Butter Cookie Mix (combine according to package directions)
1/4 cup granulated or colored sugar
24 Hershey’s Kisses
1. Prepare Peanut Butter cookie dough according to package directions.
2. Roll 1 tsp. dough into balls and roll in sugar to coat.
3. Place cookies in over and bake according to package directions (I usually undercook mine because I like a chewy, as opposed to crunchy, cookie)
4. While cookies are baking unwrap Hershey’s Kisses
5. When cookies are turning slightly golden brown on the edges remove cookies from oven and immediate top each cookie with a Hershey’s Kiss.
6. ENJOY!

Happy Holidays Everyone!
I happen to be particularly awful at baking and/or candy making—I just suck at it to be honest!
I do however, love baking cookies and making candy with my kiddos for the holidays and that’s where my semi-homemade cooking skills take center stage!
Last year I shared a few of my favorite semi-homemade holiday treats—Potato Candy (made with leftover homemade mashed potatoes) and Reindeer Chocolate Truffles (made using store bought truffles) so this year I thought I’d share another of my favorite holiday treats with all of you—Peanut Butter Blossoms…these are perfect Santa snacks!
Semi-Homemade Peanut Butter Blossoms
Yield: 2 dozen cookies
Ingredients
2 snack pack size packages Betty Crocker Peanut Butter Cookie Mix (combine according to package directions)
1/4 cup granulated or colored sugar
24 Hershey’s Kisses
1. Prepare Peanut Butter cookie dough according to package directions.
2. Roll 1 tsp. dough into balls and roll in sugar to coat.
3. Place cookies in over and bake according to package directions (I usually undercook mine because I like a chewy, as opposed to crunchy, cookie)
4. While cookies are baking unwrap Hershey’s Kisses
5. When cookies are turning slightly golden brown on the edges remove cookies from oven and immediate top each cookie with a Hershey’s Kiss.
6. ENJOY!
Happy Holidays Everyone!
Monday, November 7, 2011
If there’s one thing everyone looks forward to on their Thanksgiving table it’s definitely pumpkin pie! While I do love pumpkin pie I am also all about changing things up every once in a while so I thought it would be fun to share with you a few alternatives to pumpkin pie that you might want to try this Thanksgiving!
Every year on Thanksgiving someone in the family (either my side or my husbands) manages to make the one thing that for me rivals (and maybe even slightly surpasses) pumpkin pie—Pumpkin Roll! And while I don’t personally have a secret family recipe I took the liberty of finding a kickass recipe for y’all on allrecipes.com. You HAVE to try this!


Pumpkin Cheesecake Recipe
For crust:
In medium bowl, combine crumbs, sugar and cinnamon. Add melted butter. Press down flat into a 9-inch springform pan. Set aside.
For filling:
Beat cream cheese until smooth. Add pumpkin puree, eggs, egg yolk, sour cream, sugar and the spices. Add flour and vanilla. Beat together until well combined.
Pour into crust. Spread out evenly and place oven for 1 hour. Remove from the oven and let sit for 15 minutes. Cover with plastic wrap and refrigerate for 4 hours.
Who doesn’t love Whoopie Pies? I mean I ‘m not sure who can resist them because I know that I can’t! And how much fun would a platter full of Whoppie Pies be on your Thanksgiving table this year? I found an awesomely easy recipe for Pumpkin Whoopie Pies from rachelraymag.com that you are all going to love!

Pumpkin Whoopie Pie Recipe
Freeze the whoopie pies for up to three days.
If you’re looking for some great alternatives to the traditional pumpkin pie then these 3 recipes can’t miss—and it’s perfectly acceptable to make all three…ya know, in case you were wondering!
Every year on Thanksgiving someone in the family (either my side or my husbands) manages to make the one thing that for me rivals (and maybe even slightly surpasses) pumpkin pie—Pumpkin Roll! And while I don’t personally have a secret family recipe I took the liberty of finding a kickass recipe for y’all on allrecipes.com. You HAVE to try this!
(recipe and photo credit: allrecipes.com)
Pumpkin Roll RecipeIngredients
- 1/4 cup powdered sugar (to sprinkle on towel)
- 3/4 cup all-purpose flour
- 1/2 teaspoon baking powder
- 1/2 teaspoon baking soda
- 1/2 teaspoon ground cinnamon
- 1/2 teaspoon ground cloves
- 1/4 teaspoon salt
- 3 large eggs
- 1 cup granulated sugar
- 2/3 cup LIBBY'S® 100% Pure Pumpkin
- 1 cup walnuts, chopped (optional)
- 1 (8 ounce) package cream cheese, softened
- 1 cup powdered sugar, sifted
- 6 tablespoons butter or margarine, softened
- 1 teaspoon vanilla extract
- 1/4 cup powdered sugar (optional)
Directions
- PREHEAT oven to 375 degrees F. Grease 15 x 10-inch jelly-roll pan; line with wax paper. Grease and flour paper. Sprinkle towel with powdered sugar.
- COMBINE flour, baking powder, baking soda, cinnamon, cloves and salt in small bowl. Beat eggs and sugar in large mixer bowl until thick. Beat in pumpkin. Stir in flour mixture. Spread evenly into prepared pan. Sprinkle with nuts.
- BAKE for 13 to 15 minutes or until top of cake springs back when touched. Immediately loosen and turn cake onto prepared towel. Carefully peel off paper. Roll up cake and towel together, starting with narrow end. Cool on wire rack.
- BEAT cream cheese, powdered sugar, butter and vanilla extract in small mixer bowl until smooth. Carefully unroll cake; remove towel. Spread cream cheese mixture over cake. Reroll cake. Wrap in plastic wrap and refrigerate at least one hour. Sprinkle with powdered sugar before serving, if desired.
- My sister loves to be a little different; aside from being a vegetarian she is always trying new foods and new variations on classics! Every year for Thanksgiving she brings the most delicious Pumpkin Cheesecake and since she won’t share her recipe (I know I was bummed too) I found one from foodnetwork.com that Paula Deen makes that looks AH-MAZ-ING!

(Recipe and Photo Credit: FoodNetwork.com)
Ingredients
Crust:
- 1 3/4 cups graham cracker crumbs
- 3 tablespoons light brown sugar
- 1/2 teaspoon ground cinnamon
- 1 stick melted salted butter
Filling:
- 3 (8-ounce) packages cream cheese, at room temperature
- 1 (15-ounce) can pureed pumpkin
- 3 eggs plus 1 egg yolk
- 1/4 cup sour cream
- 1 1/2 cups sugar
- 1/2 teaspoon ground cinnamon
- 1/8 teaspoon fresh ground nutmeg
- 1/8 teaspoon ground cloves
- 2 tablespoon all-purpose flour
- 1 teaspoon vanilla extract
Directions
Preheat oven to 350 degrees F.For crust:
In medium bowl, combine crumbs, sugar and cinnamon. Add melted butter. Press down flat into a 9-inch springform pan. Set aside.
For filling:
Beat cream cheese until smooth. Add pumpkin puree, eggs, egg yolk, sour cream, sugar and the spices. Add flour and vanilla. Beat together until well combined.
Pour into crust. Spread out evenly and place oven for 1 hour. Remove from the oven and let sit for 15 minutes. Cover with plastic wrap and refrigerate for 4 hours.
Who doesn’t love Whoopie Pies? I mean I ‘m not sure who can resist them because I know that I can’t! And how much fun would a platter full of Whoppie Pies be on your Thanksgiving table this year? I found an awesomely easy recipe for Pumpkin Whoopie Pies from rachelraymag.com that you are all going to love!

(Recipe and Photo Credit: RachelRayMag.com)
Ingredients
- 1 1/2 sticks (6 ounces) unsalted butter, 1 stick melted, 1/2 stick softened
- 1 cup packed light brown sugar
- 2 large eggs, at room temperature, lightly beaten
- 1 cup canned pure pumpkin puree
- 1 tablespoon pumpkin pie spice
- 1 1/2 teaspoons pure vanilla extract
- 1 teaspoon baking powder
- 1 teaspoon baking soda
- 3/4 teaspoon plus 2 pinches salt
- 1-2/3 cups flour
- 4 ounces cream cheese, chilled
- 1 cup confectioners' sugar
Freeze the whoopie pies for up to three days.
Directions:
- Preheat the oven to 350°. Line two baking sheets with parchment paper.
- In a large bowl, whisk together the melted butter and brown sugar until smooth. Whisk in the eggs, pumpkin puree, pumpkin pie spice, 1 teaspoon vanilla, the baking powder, the baking soda and 3/4 teaspoon salt. Using a rubber spatula, fold in the flour.
-
- Using an ice cream scoop or tablespoon, drop 12 generous mounds of batter, spaced evenly, onto each baking sheet. Bake until springy to the touch, about 10 minutes. Transfer to a rack to cool completely.
- Meanwhile, using an electric mixer, cream the softened butter with the cream cheese. Add the confectioners' sugar and the remaining 2 pinches salt and 1/2 teaspoon vanilla; mix on low speed until blended, then beat on medium-high speed until fluffy, about 2 minutes.
-
- Spread the flat side of 12 cakes with the cream cheese frosting. Top each with another cake.
If you’re looking for some great alternatives to the traditional pumpkin pie then these 3 recipes can’t miss—and it’s perfectly acceptable to make all three…ya know, in case you were wondering!
Subscribe to:
Posts
(
Atom
)

Popular Posts
-
**Updated with winner at the bottom of the post** Thanks to all who entered! Anyone who sits at a computer most of the day typing can tell y...
-
*Updated at bottom with winner* Thanks to everyone who entered! Every year around this time I notice a huge difference in my skin, it ...
-
Hey y’all! I promised you more great finds for summer when I got finished with this semester of school and I’m officially finished (thank g...


