





Showing posts with label food. Show all posts
Showing posts with label food. Show all posts
Thursday, May 15, 2014
If your weeknight are like mine, then they are super busy! Between work and baseball games and practices and just plain ole everyday life, I don't always have time to make a gourmet meal, heck, who am I kidding, most nights I barely have time to heat up Hamburger Helper. Since I work nights, I am always on the lookout for a great Crock Pot meal that I can prepare in the morning and forget about it until it's time to chow down at night. Thankfully I have an amazing cousin who definitely knows her way around the kitchen, who turned me on to something that is sure to become a favorite in our house, Crock Pot French Bread Pizza.
Now, I don't think Tiff called it that, but it's definitely what the mixture brings to mind (side note: this would also make a killer lasagna filling). So if you're on the lookout for a quick, easy, oh-so yummy crock pot meal...check this one out!

1 pound of ground beef (browned and drained)
2 jars of pizza sauce
1 block of cream cheese
8 oz. bag of shredded Mozzarella cheese
1 cup bacon (cut into small pieces)
1 package pepperoni (cut into small pieces)
1. Brown and drain one pound of ground beef.
2. Add ground beef, pizza sauce, cream cheese, half of the mozzarella cheese, bacon and pepperoni to slow cooker and cook on Low for 4-6 hours.

3. Slice french bread in half long ways and pop under the broiler until brown.

4. Top french bread with a generous helping of the "sauce/filling", top with remaining cheese and place back under the broiler until bubbly and brown.

5. Enjoy!
Now, I don't think Tiff called it that, but it's definitely what the mixture brings to mind (side note: this would also make a killer lasagna filling). So if you're on the lookout for a quick, easy, oh-so yummy crock pot meal...check this one out!
Crock-Pot French Bread Pizza "Sauce/Filling"
Ingredients
2 loafs of French Bread1 pound of ground beef (browned and drained)
2 jars of pizza sauce
1 block of cream cheese
8 oz. bag of shredded Mozzarella cheese
1 cup bacon (cut into small pieces)
1 package pepperoni (cut into small pieces)
Directions
1. Brown and drain one pound of ground beef.
2. Add ground beef, pizza sauce, cream cheese, half of the mozzarella cheese, bacon and pepperoni to slow cooker and cook on Low for 4-6 hours.
3. Slice french bread in half long ways and pop under the broiler until brown.
4. Top french bread with a generous helping of the "sauce/filling", top with remaining cheese and place back under the broiler until bubbly and brown.
5. Enjoy!
Friday, November 15, 2013
I’ve mentioned many times over the years how much all of my children love yogurt and the older they get, the more they seem to like it, which means that it is a staple in our refrigerator. While each of my children have their own favorite flavors of yogurt, their favorite brand remains the same…Yoplait Go-GURT®.

It’s not always easy for me to get my children to eat right and it’s certainly a challenge for me to get them to choose healthy snacks, but that’s one of the reasons that I love how much they like Go-GURT®, it’s good for them, it’s fun for them to eat (I mean, who wouldn’t want to eat yogurt from a tube), it’s super easy to add to their lunches for school (pop it in the freezer the night before and it’s cold and ready to enjoy come lunch time) and now Go-GURT® is now made with natural colors and flavors, and contains no high-fructose corn syrup…I consider that a win—win—win! Did I also mention that Go-GURT is a good source of vitamins A, D and Calcium? Because it is and that’s just another of the many reasons that I always have it on hand!

The awesome people at MyBlogSpark and General Mills, hooked us up with several free product coupons as well as a Target gift card so I took the opportunity to stock up on some lunchtime essentials to go with the Go-GURT® for school lunches. While my kids enjoy all of the Go-GURT® flavors, their favorites are definitely Banana Spilt and Strawberry Splash, such cool names too!
Do you kiddos like Go-GURT®? If so I have a great giveaway just for you! Check out the details below and be sure to enter to win!
WIN IT!
One MIBR reader will win a Go-GURT® prize pack containing a $25 Target Gift Card and coupons for FREE Go-GURT®. Check out the Rafflecopter widget below to enter and to see official rules! Good Luck!
a Rafflecopter giveaway
“Disclosure: The information and prize pack have been provided by General Mills through MyBlogSpark.”

It’s not always easy for me to get my children to eat right and it’s certainly a challenge for me to get them to choose healthy snacks, but that’s one of the reasons that I love how much they like Go-GURT®, it’s good for them, it’s fun for them to eat (I mean, who wouldn’t want to eat yogurt from a tube), it’s super easy to add to their lunches for school (pop it in the freezer the night before and it’s cold and ready to enjoy come lunch time) and now Go-GURT® is now made with natural colors and flavors, and contains no high-fructose corn syrup…I consider that a win—win—win! Did I also mention that Go-GURT is a good source of vitamins A, D and Calcium? Because it is and that’s just another of the many reasons that I always have it on hand!

The awesome people at MyBlogSpark and General Mills, hooked us up with several free product coupons as well as a Target gift card so I took the opportunity to stock up on some lunchtime essentials to go with the Go-GURT® for school lunches. While my kids enjoy all of the Go-GURT® flavors, their favorites are definitely Banana Spilt and Strawberry Splash, such cool names too!
Do you kiddos like Go-GURT®? If so I have a great giveaway just for you! Check out the details below and be sure to enter to win!
WIN IT!
One MIBR reader will win a Go-GURT® prize pack containing a $25 Target Gift Card and coupons for FREE Go-GURT®. Check out the Rafflecopter widget below to enter and to see official rules! Good Luck!
a Rafflecopter giveaway
“Disclosure: The information and prize pack have been provided by General Mills through MyBlogSpark.”
Saturday, October 19, 2013
I don't know about y'all, but for me, there's nothing more comforting than a big, warm bowl of yummy soup and a great sandwich on a cool Fall night. And if you're a busy Mom like me, then there's nothing more simple than having a great soup and sandwich from the All-Star Sandwich Bar from Schwan’s Home Service!

With hearty fall sandwiches like the New Grilled Cuban Style Panino or New Grilled Southwest Style Chicken Panino, served with a side of New Crispy Waffle Fries or Loaded Baked Potato Soup, offer the family delicious options to keep everyone warm and cozy this fall.
About Schwan's....
For more than 60 years, Schwan’s Home Service has offered over 350+ delicious foods, flash frozen at the peak of freshness, conveniently delivered right to your door. Schwan’s looks forward to being your meal-time helper, providing quality products, tips and tricks that inspire your creative side when you want to create a meal.

Schwan's was nice enough to send us a few of their seasonal products to check out recently and the Southern Ohio weather cooperated perfectly with several cool nights, just perfect for soup and sandwiches! I'm a huge fan of Loaded Baked Potato soup and that means that I am also extremely picky about it, but Schwan's did not disappoint, it was rich and creamy and loaded with lots of potato goodness, it's quickly become one of my favorites and the fact that it was ready in no time, made it even better! Since I started working nights (from home, which is another story in itself) it's been my husband's responsibility most nights to make dinner and while he can cook, his culinary repertoire is extremely limited (to say the least) so I'm constantly looking for quick, easy, and yummy standby's that he can turn to without much fuss; Schwan's New Grilled Cuban Style Panino and New Grilled Southwest Style Chicken Panino turned out to be perfect. My husband paired these yummy sandwiches with a side of Schwan's New Crispy Waffle Fries and it was a quick, easy dinner that everyone loved.

While we were overall very pleased with the Schwan's All-Star Sandwich Bar products that we received, I want to point out one thing that we were a little disappointed in and that's the Panino sandwiches when they were cooked in the microwave. The first time we cooked the sandwiches was in the microwave (following the directions of course) and they came out so hard that we couldn't cut into them, much less eat them. The next time we tried them following the micro/oven cooking directions and they came out much better, so if you get these, my best advice would be not to cook them in the microwave. Other than the microwave mishap, we loved all of the items from Schwan's and would definitely recommend them to anyone who is looking for a yummy, hearty quick meal this Fall!
WIN IT!
Good news! One MIBR reader is going to win some yummy goodies from Schwan's All-Star Sandwich Bar! Check out the Rafflecopter widget below for official rules and to enter!
a Rafflecopter giveaway
Disclosure: I received the items mentioned above in order to facilitate my review...all opinions are my own!
With hearty fall sandwiches like the New Grilled Cuban Style Panino or New Grilled Southwest Style Chicken Panino, served with a side of New Crispy Waffle Fries or Loaded Baked Potato Soup, offer the family delicious options to keep everyone warm and cozy this fall.
About Schwan's....
For more than 60 years, Schwan’s Home Service has offered over 350+ delicious foods, flash frozen at the peak of freshness, conveniently delivered right to your door. Schwan’s looks forward to being your meal-time helper, providing quality products, tips and tricks that inspire your creative side when you want to create a meal.

Schwan's was nice enough to send us a few of their seasonal products to check out recently and the Southern Ohio weather cooperated perfectly with several cool nights, just perfect for soup and sandwiches! I'm a huge fan of Loaded Baked Potato soup and that means that I am also extremely picky about it, but Schwan's did not disappoint, it was rich and creamy and loaded with lots of potato goodness, it's quickly become one of my favorites and the fact that it was ready in no time, made it even better! Since I started working nights (from home, which is another story in itself) it's been my husband's responsibility most nights to make dinner and while he can cook, his culinary repertoire is extremely limited (to say the least) so I'm constantly looking for quick, easy, and yummy standby's that he can turn to without much fuss; Schwan's New Grilled Cuban Style Panino and New Grilled Southwest Style Chicken Panino turned out to be perfect. My husband paired these yummy sandwiches with a side of Schwan's New Crispy Waffle Fries and it was a quick, easy dinner that everyone loved.

While we were overall very pleased with the Schwan's All-Star Sandwich Bar products that we received, I want to point out one thing that we were a little disappointed in and that's the Panino sandwiches when they were cooked in the microwave. The first time we cooked the sandwiches was in the microwave (following the directions of course) and they came out so hard that we couldn't cut into them, much less eat them. The next time we tried them following the micro/oven cooking directions and they came out much better, so if you get these, my best advice would be not to cook them in the microwave. Other than the microwave mishap, we loved all of the items from Schwan's and would definitely recommend them to anyone who is looking for a yummy, hearty quick meal this Fall!
WIN IT!
Good news! One MIBR reader is going to win some yummy goodies from Schwan's All-Star Sandwich Bar! Check out the Rafflecopter widget below for official rules and to enter!
a Rafflecopter giveaway
Disclosure: I received the items mentioned above in order to facilitate my review...all opinions are my own!
Friday, October 11, 2013
I love Halloween! And I love the opportunity to share anything Halloween related with all of you, so I thought these Halloween Frankenpops would be perfect. I am definitely going to try these for my daughter's birthday party this weekend--they're so cute!

Here's a cute video with step-by-step instructions to make these adorably spooky Halloween treats! Check out the recipe below, courtesy of The Kitchen Explorers from PBS Parent.

Here's a cute video with step-by-step instructions to make these adorably spooky Halloween treats! Check out the recipe below, courtesy of The Kitchen Explorers from PBS Parent.
Recipe: Frankenpops
A quick and easy marshmallow treat recipe for Halloween. Made with chocolate candy coated marshmallows, making these treats make for a great Halloween activity.Ingredients
- 1 – 16 ounces dark green candy coating
- 2 tablespoons white candy coating
- 2 tablespoons black candy coating
- 1/4 cup purple candy coating
- 1 bag large marshmallows
- special equipment: 36 lollipop sticks
Instructions
- Melt the dark green candy coatings in the microwave in thirty second intervals, stirring after each time until the chocolate is smooth.
- Dip a lollipop stick ¼” in and then into a marshmallow ¾ of the way through.
- Dip marshmallows into the melted coating, turning the marshmallow as it coats.
- Tilt the marshmallow over a cup and gently tap the stick until excess coating drips off.
- Allow the pops to dry by sticking the end of the stick into a foam block.
- As the pops dry, make the eyes by piping small 1/8-1/4-inch circles of melted white coating. Finish the eyes by adding a small speck of melted black coating to the center of the white "eye balls." Allow the eyes to harden before using.
- Once the green coated pops are hard, dip only the top of each marshmallow in the melted purple coating. Using a toothpick, add texture to each pop's hair. Allow the hair to dry before adding facial features.
- Add a little dot of chocolate where the eyeballs will be placed. Using the melted coating as glue, add two eyeballs to every pop.
- Using an edible black ink marker or melted black coating which is in a piping bag with a tiny opening, pipe a decorate scar and mouth on each pop.
- Allow the pops to harden before eating.
Thursday, September 12, 2013

I don't know how after-school goes down at your house, but at my house, it means FOOD and lots of it. I can't tell you how often my kids get off of the bus, come through the door (barely acknowledging my presence) and make a beeline for the refrigerator. With four hungry kiddos looking for something quick, easy and delicious to snack on, I'm constantly looking for new snack ideas that are easy enough for them to prepare themselves and yummy enough for Mom to sneak one or two if need be...what? Moms get hungry too ya know. That's one of the reasons why I love Farm Rich, they're products are easy to prepare, super quick (even in the oven) and so good that my kids routinely ask for them at the grocery store.
Farm Rich has been a much loved brand at our house for years and though I love the old standbys (my favorites are the Mozzarella Bites and Mozzarella Sticks). I also get excited when they introduce new products and this summer they introduced three new products that have quickly become favorites at our house. Toasted Ravioli, Crispy Dill Pickles and Chili Cheese Bites are the three newest creations from Farm Rich and they are all three every bit as scrumptious as they sound!
Toasted Ravioli makes a quick and easy family dinner--perfectly crispy and golden brown with melted Mozzarella, Parmesan, Asiago and Romano cheeses inside. Crispy Dill Pickles are inspired by a Southern favorite, lightly breaded and seasoned to make a delicious snack or appetizer. Chili Cheese Bites bring flavor in every bite, with smooth cheddar cheese and a mild chili sauce in a crispy corn chip coating.


Farm Rich sent us free product coupons to try out some of the new products and I personally couldn't wait. At the store I picked up the Crispy Dill Pickles and Chili Cheese Bites to try out in addition to my favorite Mozzarella Bites. As soon as the kiddos came home from school and saw Farm Rich in the freezer they asked for them, in the name of reviewing them of course...they're smart ones I tell ya. One of the things I love most about Farm Rich products (aside from them being seriously delish) is that they take no time to cook in the oven which is great when you have several hungry kids. I've never been much of a fan of Fried Pickles, which is strange since I love pickles as much as I do, but I tried them anyway and actually thought they were pretty darn good, my kids however, couldn't get enough of them (especially dipped in ranch dressing--which turns my stomach even thinking about it, but whatever works I guess). I was skeptical about the Crispy Dill Pickles actually being crispy, but much to my surprise they were very crispy. While I wasn't big on the fried pickles, I couldn't wait to try the Chili Cheese Bites, I mean chili, cheese and a crispy corn chip coating--what's not to love...seriously? With one bite I was in heaven, honestly people, these things should be illegal, I mean, I'm not even sure that the kids had more than one each because I seriously made them and then went and hid in my room until they were finished--yes...they're that good! Make sure you check out the quick meal and appetizer recipes inspired by Farm Rich as well, you'll be glad that you did!
If you haven't tried Farm Rich (or if you're already a Farm Rich fan and just haven't tried their newest offerings) you SO should, honestly, you'll be an instant fan! Speaking of fans, make sure you head on over and Like the Farm Rich Facebook Page and Follow @FarmRichSnacks on Twitter and Pinterest for the latest news and products!
WIN IT!
I hope y'all are hungry, because one lucky MIBR reader is going to score some coupons for FREE Farm Rich products! For official rules and to enter check out the Rafflecopter Widget below! Good Luck!
a Rafflecopter giveaway
Disclosure: I received free product coupons to facilitate my review...all opinions are my own and were not influenced by Farm Rich or anyone else.
Tuesday, August 27, 2013
One of my very favorite things in life is fajitas—I seriously cannot get enough of them—so since it’s summer (for a few more glorious days anyway) I thought I’d change things up a bit and combine two of my favorite things (fajitas and grilling) and come up with something amazing….Grilled Chicken Fajita Kabobs!
2 large green peppers cut into bite sized chunks (red and yellow peppers work well too and look gorgeous)
1 medium to large onion cut into chunks (same size as peppers and chicken)
1 package of fajita seasoning
1/4 tsp. vegetable oil
1/4 cup (or less) water
bamboo (or metal skewers)
2. Cut chicken into bit size pieces (small enough to cook quickly, but large enough to fit securely on the skewers) and add chicken to one of the shallow dishes, cover and refrigerate for at least 30 minutes.
3. Cut peppers and onions into bite size pieces (the same size as the chicken), add peppers and onions to the second shallow baking dish, cover and refrigerate for 30 minutes.
4. Heat grill to appropriate temperature, I usually put my food on when the grill has reached 350°. *If using bamboo skewers place skewers into warm water for at least 30 minutes before putting on the grill.*
5. Place chicken, peppers and onions on skewers, leaving room at the top and bottom to allow for easy pickup, alternating between the three until skewers are full.
6. Place skewers on the grill until chicken is cooked through. This usually takes just a couple of minutes per side.
7. You can either eat the chicken fajita kabobs on the skewer or slide the chicken and veggies off onto a warm flour tortilla and add your favorite toppings (this is the way I prefer).
There you have it…a super easy, somewhat quick, and completely delicious dinner that’s a yummy variation of a Mexican favorite! Bon Appétit !
Grilled Chicken Fajita Kabobs

Ingredients
4 chicken breasts diced into small chunks
2 large green peppers cut into bite sized chunks (red and yellow peppers work well too and look gorgeous)
1 medium to large onion cut into chunks (same size as peppers and chicken)
1 package of fajita seasoning
1/4 tsp. vegetable oil
1/4 cup (or less) water
bamboo (or metal skewers)
Directions
1. Combine water, vegetable oil and fajita seasoning and divide into 2 shallow baking dishes, set aside.
2. Cut chicken into bit size pieces (small enough to cook quickly, but large enough to fit securely on the skewers) and add chicken to one of the shallow dishes, cover and refrigerate for at least 30 minutes.
3. Cut peppers and onions into bite size pieces (the same size as the chicken), add peppers and onions to the second shallow baking dish, cover and refrigerate for 30 minutes.
4. Heat grill to appropriate temperature, I usually put my food on when the grill has reached 350°. *If using bamboo skewers place skewers into warm water for at least 30 minutes before putting on the grill.*
5. Place chicken, peppers and onions on skewers, leaving room at the top and bottom to allow for easy pickup, alternating between the three until skewers are full.
6. Place skewers on the grill until chicken is cooked through. This usually takes just a couple of minutes per side.
7. You can either eat the chicken fajita kabobs on the skewer or slide the chicken and veggies off onto a warm flour tortilla and add your favorite toppings (this is the way I prefer).
There you have it…a super easy, somewhat quick, and completely delicious dinner that’s a yummy variation of a Mexican favorite! Bon Appétit !
Monday, August 19, 2013
The days are starting to get more comfortable and the nights are starting to require a jacket to stay outside after sunset, the kids are going back to school and I have visions of falling leaves and pumpkins already dancing in my head, that can only mean one thing—fall is coming—quickly! Fall is by far my favorite time of year and I love it for so many reasons, but one of the biggest is because of all of the yummy fall recipes that I can finally cook after a long summer of trying not to turn on the oven—and I can’t wait!

With the kiddos heading back to school, I’ll definitely have a little more time to put into my favorite recipes, but I’ll still without a doubt take some help from semi-homemade staples like Success boil-in-bag rice—it is one ingredient that I always have on hand for quick dinners. Success has long been my go-to brand for rice and I love the convenience of their boil-in-bag rice and with their new Thai Jasmine Rice, the only boil-in-bag rice currently available in this variety, I can experiment till my hearts content!
Serving up exotic foods at your dinner table is a fun way to experience another culture and replace weekly staples that have become a little boring. Success® Rice now makes it easy to bring the tastes of Thailand into your home! Transport your family to another country and treat them to the flavors of Asia.

Success Rice recently introduced Thai Jasmine Rice, the only boil-in-bag rice currently available in this variety. In just 10 minutes, you can enjoy an aromatic culinary experience for less than $3. Success Rice is also available in Basmati Rice, Whole Grain Brown Rice and White Rice varieties.
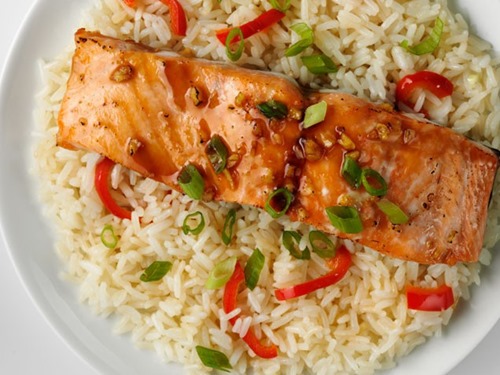
To make mealtime even simpler, visit iVillage.com for quick and easy recipes like Pineapple Thai Rice and Honey Ginger Baked Salmon (recipe is also below). Providing well-rounded, hearty meals for your family can be easy and so can other areas of your life – surf around iVillage to find tips and tricks for simplifying other tasks such as budgeting, home organizing and fitness.
1/3 cup orange juice
1/4 cup light soy sauce
1/3 cup honey
1 tsp. garlic, minced
1 tsp. fresh ginger root
4 (4 oz. each) salmon fillets
1 tsp. oil
1/2 cup red bell pepper, sliced
1/4 cup green onion, sliced
In a small saucepan combine orange juice, soy sauce, honey, garlic and ginger. Cook over medium heat for 1 minute. Reserve 2/3 cups marinade.
Place remaining marinade and salmon fillets into a plastic zippered bag and refrigerate for 15 minutes.
Remove salmon from marinade, place on aluminum foil-lined baking pan and bake for 20 minutes. Meanwhile, return 2/3 cup reserved marinade to small saucepan and simmer over medium-high heat for 5 minutes or until syrupy.
Heat oil in a medium skillet over medium heat. Sauté red bell pepper 2 minutes. Add peppers to cooked rice. Remove salmon from oven and serve over rice. Top with sauce and garnish with green onions.
Looks yummy—no? You can also snag a coupon for 50¢ off (at the top of the iVillage page) so you can save a little $ and serve up some Success Thai Jasmine Rice for dinner tonight! I also have some Success Thai Jasmine Rice to give away to one lucky MIBR reader so check out the Rafflecopter widget below for official rules and to enter!
a Rafflecopter giveaway Disclosure: I received the items above in order to facilitate my review, all opinions are my own!

With the kiddos heading back to school, I’ll definitely have a little more time to put into my favorite recipes, but I’ll still without a doubt take some help from semi-homemade staples like Success boil-in-bag rice—it is one ingredient that I always have on hand for quick dinners. Success has long been my go-to brand for rice and I love the convenience of their boil-in-bag rice and with their new Thai Jasmine Rice, the only boil-in-bag rice currently available in this variety, I can experiment till my hearts content!
Serving up exotic foods at your dinner table is a fun way to experience another culture and replace weekly staples that have become a little boring. Success® Rice now makes it easy to bring the tastes of Thailand into your home! Transport your family to another country and treat them to the flavors of Asia.

Success Rice recently introduced Thai Jasmine Rice, the only boil-in-bag rice currently available in this variety. In just 10 minutes, you can enjoy an aromatic culinary experience for less than $3. Success Rice is also available in Basmati Rice, Whole Grain Brown Rice and White Rice varieties.
To make mealtime even simpler, visit iVillage.com for quick and easy recipes like Pineapple Thai Rice and Honey Ginger Baked Salmon (recipe is also below). Providing well-rounded, hearty meals for your family can be easy and so can other areas of your life – surf around iVillage to find tips and tricks for simplifying other tasks such as budgeting, home organizing and fitness.
Honey-Ginger Baked Salmon with Jasmine Rice

Makes 4 Servings
Ingredients
2 bags Success Jasmine Rice1/3 cup orange juice
1/4 cup light soy sauce
1/3 cup honey
1 tsp. garlic, minced
1 tsp. fresh ginger root
4 (4 oz. each) salmon fillets
1 tsp. oil
1/2 cup red bell pepper, sliced
1/4 cup green onion, sliced
Directions
Prepare rice according to package directions. Heat oven to 375º.In a small saucepan combine orange juice, soy sauce, honey, garlic and ginger. Cook over medium heat for 1 minute. Reserve 2/3 cups marinade.
Place remaining marinade and salmon fillets into a plastic zippered bag and refrigerate for 15 minutes.
Remove salmon from marinade, place on aluminum foil-lined baking pan and bake for 20 minutes. Meanwhile, return 2/3 cup reserved marinade to small saucepan and simmer over medium-high heat for 5 minutes or until syrupy.
Heat oil in a medium skillet over medium heat. Sauté red bell pepper 2 minutes. Add peppers to cooked rice. Remove salmon from oven and serve over rice. Top with sauce and garnish with green onions.
Looks yummy—no? You can also snag a coupon for 50¢ off (at the top of the iVillage page) so you can save a little $ and serve up some Success Thai Jasmine Rice for dinner tonight! I also have some Success Thai Jasmine Rice to give away to one lucky MIBR reader so check out the Rafflecopter widget below for official rules and to enter!
a Rafflecopter giveaway Disclosure: I received the items above in order to facilitate my review, all opinions are my own!
Tuesday, July 23, 2013
One of my absolute favorite summer memories from when I was a child was playing outside with my friends, most of the time all day long until the street lights came on, and Bomb Pops. As an adult, I don’t do much playing outside, unless I’m chasing my little monsters, but I do still enjoy a Bomb Pop on a hot summer day.
A few nights ago I was having a serious craving for one of my favorite popsicles when I decided to try my hand at making a homemade version of a Bomb Pop. While I couldn’t get the consistency of mine to quite match the store bought version(I don’t know the word really to describe their consistency, aside from almost creamy), the taste was almost right on. And while I still definitely prefer the real thing, my Homemade Bomb Pop’s will definitely hit the spot the next time those late night cravings hit again.
You’ll Need:
1 package of Cherry Kool-Aid
1 package of Blue Raspberry Kool-Aid
1 package of Lemonade
Sugar
Popsicle molds (small paper cups and popsicle sticks work too)
Directions:
Prepare Kool-Aid according to package directions (I made all 3 flavors at the same time in different containers). Pour Blue Raspberry Kool-Aid into the bottom of popsicle molds (fill molds about 1/3 full with Blue Raspberry Flavor) and place in the freezer to freeze completely. (I should mention that this process does take a little time, but the results are awesome so it’s worth it and the kids had a lot of fun helping so I consider that a success).
Once blue layer has frozen, remove popsicle molds and pour 1/3 of the Lemonade over the Blue Raspberry layer and pop into freezer until Lemonade layer is almost frozen (with a thin layer of ice over the top) and then slowly add the Cherry Kool-Aid on top of the Lemonade mixture, filling the mold to the top. Place tops on the molds (you may have to push a little harder when inserting the tops (if they have sticks attached to the tops) to carefully break through the lemonade layer. Freeze popsicles until completely frozen (I chose to freeze them overnight) and serve.
TIP: If you’re popsicle molds are like mine, sitting them down in a bowl of hot water before trying to pull them out of the mold will help them release easily.
Enjoy!
A few nights ago I was having a serious craving for one of my favorite popsicles when I decided to try my hand at making a homemade version of a Bomb Pop. While I couldn’t get the consistency of mine to quite match the store bought version(I don’t know the word really to describe their consistency, aside from almost creamy), the taste was almost right on. And while I still definitely prefer the real thing, my Homemade Bomb Pop’s will definitely hit the spot the next time those late night cravings hit again.
Homemade Bomb Pops

You’ll Need:
1 package of Cherry Kool-Aid
1 package of Blue Raspberry Kool-Aid
1 package of Lemonade
Sugar
Popsicle molds (small paper cups and popsicle sticks work too)
Directions:
Prepare Kool-Aid according to package directions (I made all 3 flavors at the same time in different containers). Pour Blue Raspberry Kool-Aid into the bottom of popsicle molds (fill molds about 1/3 full with Blue Raspberry Flavor) and place in the freezer to freeze completely. (I should mention that this process does take a little time, but the results are awesome so it’s worth it and the kids had a lot of fun helping so I consider that a success).
Once blue layer has frozen, remove popsicle molds and pour 1/3 of the Lemonade over the Blue Raspberry layer and pop into freezer until Lemonade layer is almost frozen (with a thin layer of ice over the top) and then slowly add the Cherry Kool-Aid on top of the Lemonade mixture, filling the mold to the top. Place tops on the molds (you may have to push a little harder when inserting the tops (if they have sticks attached to the tops) to carefully break through the lemonade layer. Freeze popsicles until completely frozen (I chose to freeze them overnight) and serve.
TIP: If you’re popsicle molds are like mine, sitting them down in a bowl of hot water before trying to pull them out of the mold will help them release easily.
Enjoy!
Tuesday, June 18, 2013
“Disclosure: The information and prize pack have been provided by General Mills through MyBlogSpark.”
My kids eat…a lot. And if there’s one thing they eat more of than anything else, it’s cereal. Not only do my kiddos enjoy a big ole bowl of crunchy cereal goodness every morning (and more often than not as a bedtime snack), but my husband is also a huge cereal fanatic. It seems like I’m constantly buying cereal and we’re always trying something new, like recently when we had the chance to check out Hershey’s new Cookies ‘n’ Crème cereal thanks to Hershey’s and MyBlogSpark!

I’m not a huge cereal fan, but I do love me some Hershey’s so I was interested to see what this new cookies ‘n’ crème cereal was all about, here’s the scoop (haha) on Big G and Hershey’s new breakfast offering…
Who knew yummy could also be full of so many good things for you? As I mentioned above, my children and husband love cereal and since they do love their cereal, they’re also a little picky when it comes to what they pour into their favorite cereal bowls (yes, they all do have a favorite cereal bowl). I knew that the chances of my family not liking a cereal from Hershey’s was slim to none, but I wasn’t prepared for them to like it as much as they did…they demolished the entire box by breakfast the next morning! They LOVED it! My husband, who is one of the pickiest people I know (especially when it comes to his cereal) liked it so much that he now asks for it nearly every time I go to the grocery store, I’d say that’s a success! If you’re family are big cereal eaters then I definitely suggest picking up a box (or 3) of Hershey’s Cookies ‘n’ Crème next time you head out to the store, they’ll be so happy that you did!
If you’d like to try Hershey’s new Cookies ‘n’ Crème cereal for yourself, keep reading and find out how you can win the Hershey’s Cookies ‘n’ Crème prize pack below! And don’t forget to “Like” General Mills on Facebook and Follow @GeneralMills on Twitter. And don't forget to grab a coupon for $1.10 off of one box of Hershey's Cookies 'n' Creme cereal...great coupon for a great cereal!
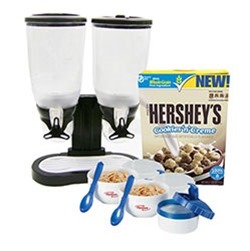
So who wants a chance to win an awesome Hershey’s Cookies ‘n’ Crème prize pack from General Mills and MyBlogSpark? Details and how to enter below…Good Luck Y’all!
WHAT CAN YOU WIN?
One lucky MIBR reader will win a Hershey’s Cookies ‘n’ Crème prize pack containing…
a Rafflecopter giveaway
My kids eat…a lot. And if there’s one thing they eat more of than anything else, it’s cereal. Not only do my kiddos enjoy a big ole bowl of crunchy cereal goodness every morning (and more often than not as a bedtime snack), but my husband is also a huge cereal fanatic. It seems like I’m constantly buying cereal and we’re always trying something new, like recently when we had the chance to check out Hershey’s new Cookies ‘n’ Crème cereal thanks to Hershey’s and MyBlogSpark!

I’m not a huge cereal fan, but I do love me some Hershey’s so I was interested to see what this new cookies ‘n’ crème cereal was all about, here’s the scoop (haha) on Big G and Hershey’s new breakfast offering…
Now you can enjoy the delicious taste of Hershey’s Cookies ‘n’ Creme in a breakfast cereal from Big G.
With an irresistible taste the whole family will love from a brand you trust, new Hershey’s Cookies ‘n’ Creme cereal is made from 100% whole grains with at least 14g of whole grain per serving (at least 48g recommended daily). Best of all, Hershey’s Cookies ‘n’ Creme cereal has only 9 grams of sugar per serving and is a good source of Calcium, Vitamin D, and 10 other essential vitamins and minerals.
Who knew yummy could also be full of so many good things for you? As I mentioned above, my children and husband love cereal and since they do love their cereal, they’re also a little picky when it comes to what they pour into their favorite cereal bowls (yes, they all do have a favorite cereal bowl). I knew that the chances of my family not liking a cereal from Hershey’s was slim to none, but I wasn’t prepared for them to like it as much as they did…they demolished the entire box by breakfast the next morning! They LOVED it! My husband, who is one of the pickiest people I know (especially when it comes to his cereal) liked it so much that he now asks for it nearly every time I go to the grocery store, I’d say that’s a success! If you’re family are big cereal eaters then I definitely suggest picking up a box (or 3) of Hershey’s Cookies ‘n’ Crème next time you head out to the store, they’ll be so happy that you did!
If you’d like to try Hershey’s new Cookies ‘n’ Crème cereal for yourself, keep reading and find out how you can win the Hershey’s Cookies ‘n’ Crème prize pack below! And don’t forget to “Like” General Mills on Facebook and Follow @GeneralMills on Twitter. And don't forget to grab a coupon for $1.10 off of one box of Hershey's Cookies 'n' Creme cereal...great coupon for a great cereal!

So who wants a chance to win an awesome Hershey’s Cookies ‘n’ Crème prize pack from General Mills and MyBlogSpark? Details and how to enter below…Good Luck Y’all!
WHAT CAN YOU WIN?
One lucky MIBR reader will win a Hershey’s Cookies ‘n’ Crème prize pack containing…
-
Box of Hershey’s Cookies ‘n’ Creme Cereal
-
Cereal storage container
-
2 Cereal-To-Go containers
a Rafflecopter giveaway
Tuesday, June 11, 2013
It’s summertime and that means camping trips and lots of hotdogs and marshmallows roasting over those roaring campfires. My kids love S’mores and as soon as the temperature climbs they start asking for them, but since I don’t always have a campfire handy they don’t get to enjoy them as much as I’m sure they’d like. A couple of weekends ago I was feeling a little adventurous so I decided to try to make a S’mores pie, but while searching online for a recipe I noticed that all of them I found required the use of an oven and that’s one kitchen appliance I like to stay far away from in the summer. So I decided to come up with my own no-bake S’mores Pie recipe…it was a huge hit with everyone! Let me know if you decide to try it, you won’t be sorry you did!
1 package (3.9 oz.) Chocolate Instant Pudding
1/2 cups cold milk
2.5 cups of miniature marshmallows
Hershey’s chocolate bar finely chopped or shaved to garnish pie (optional)
No-Bake S’mores Pie

Ingredients
1 9 inch graham cracker pie crust1 package (3.9 oz.) Chocolate Instant Pudding
1/2 cups cold milk
2.5 cups of miniature marshmallows
Hershey’s chocolate bar finely chopped or shaved to garnish pie (optional)
Directions
Prepare pudding according to package directions for pies and pour into graham cracker crust. ( didn’t have a graham cracker crust so I used graham crackers, a pinch of sugar and butter and made my own…super simple). Refrigerate pie for at least 2 hours to allow pudding to set. Once pudding has set , arrange marshmallows on top of the pie and place pie under broiler just until the tops of the marshmallows begin to brown. Remove pie from oven and sprinkle with chocolate. Serve immediately. Leftovers can be refrigerated, but this pie is so much yummier when the marshmallows are ooey, gooey!Friday, January 25, 2013

I’ve never been much of a football fan, in fact, until this past season, I dreaded Sundays and Mondays and every other day/night that football dominated my television. My husband plays fantasy football every year, so in addition to supporting his favorite team (the Cincinnati Bengals) he also “had to watch” every single football game the entire season, normally this behavior would drive me crazy, but this year that behavior helped me find a team I could finally get behind and dare I say, actually turn me into a football fan. Who knew several weeks ago when I discovered how much I adore the San Francisco 49ers (I know, it’s really weird for a Cincinnati girl to adopt a team all the way across the country as her favorite, but what are you gonna do) and their completely awesome quarterback Colin Kaepernick, that my team ( it feels weird saying that) would actually end up playing in Super Bowl XLVII??? I have to say, it’s rather exciting for me! Though I’ve never been much of a football fan, the Super Bowl is the one game that we always watch and that usually means lots of family, friends and good food!
I had the opportunity recently to work with Del Monte on a fun campaign centering around their Petite Cut Diced Tomatoes (a product that I use all the time) to create some great recipes for the big game and I couldn’t wait to get started! Del Monte sent me two new varieties of Petite Cut Diced Tomatoes to incorporate into my game day dishes: Del Monte® Petite Cut® Diced Tomatoes with Green Chilies and Del Monte® Petite Cut® Diced Tomatoes with Chipotle Chilies and I knew exactly how I was going to use them.

When it comes to cooking for the big game, it’s usually a mixture of everyone’s favorite snack foods (chips and dip, pigs in a blanket, egg rolls) and something more substantial like quesadillas or chili or both. Since chili is usually on my game day menu I decided to start there by adding a can of Del Monte® Petite Cut® Diced Tomatoes with Green Chilies to the recipe and the results were pretty darn good if I do say so myself. My usual chili is rather mild since I have two little ones who can’t tolerate spicy foods like the rest of us can, but the addition of the tomatoes with green chilies only added a slight kick and a great flavor, I think I may have to add them from now on! Chicken Quesadilla are my specialty, I make them at least a couple of times a month for our family, they’re super easy, so yummy and don’t take too much time so they’re the perfect week night meal for us, but they are also great to serve for guests as well—they’re yummy. I thought that taking my original quesadilla recipe and tweaking it a bit to include the Del Monte® Petite Cut® Diced Tomatoes with Chipotle Chilies could work well and I was definitely right. Check out my Chicken Quesadilla recipe below…you’ll want to pin this one!
Kickin’ Chipotle Chicken Quesadillas

Serves up to 10 people
Ingredients
2.5 lbs boneless, skinless chicken breast (cut into bite size pieces)10 Azteca flour tortillas
4 oz. cream cheese softened
1- 14.5 oz can Del Monte® Petite Cut® Diced Tomatoes with Chipotle Chilies drained
1 packet Chicken Taco seasoning
1- 8oz. package of shredded mild cheddar or fiesta blend cheese
1- 4oz. can green chilies
Directions
1. Cut chicken breasts into bite-size pieces and cook in lightly oiled non-stick pan until cooked through. Add chicken taco seasoning to diced chicken and cook according to package directions.2. Transfer chicken to medium mixing bowl and add cream cheese, tomatoes, and half of the shredded cheese. Mix until well incorporated.
3. Take 1 flour tortilla and add 2 TBS of the chicken mixture to half of the tortilla and spread mixture to cover. Add additional cheddar cheese (if desired), fold tortilla in half and cook in an lightly oiled (I used cooking spray) non-stick pan and allow quesadilla to cook until cheese in melted and both sides are brown.
4. Allow quesadilla to cool before slicing into 4 equal pieces (a pizza cutter does this beautifully).
5. Serve and enjoy!
This recipe is super simple and though the Del Monte® Petite Cut® Diced Tomatoes with Chipotle Chilies were different than we are used to, I think they worked great in this dish and everyone seemed to agree. I can’t wait until Super Bowl Sunday to make both of these dishes for all of our party guests.
In addition to having two great new diced tomato varieties, Del Monte is helping to inspire a little creativity in the kitchen by kicking off their Southwestern Tomato Kick-Off Sweepstakes and this is one sweepstakes you are definitely going to want to check out! As part of the sweepstakes you can share tips and recipes featuring the new Del Monte Southwestern-Style Petite Cut® Diced Tomato varieties. One lucky winner will take home an exciting entertainment package including: a Sony® 55” LED TV, Bose® home theater system and Sony® Blu-ray player (ARV $4,779.00 USD) so make sure you head over to the Del Monte website and look at the official rules!
You can keep up with the Southwestern Tomato Kick-Off Sweepstakes by Liking the Del Monte on Facebook, Following Del Monte on Pinterest and Following @DelMonteFoods on Twitter! You can also check out “Del Monte Southwestern Tomato Kick-Off” Pinterest board for some great recipes featuring Del Monte’s new diced tomato varieties, by Hungry Girl Lisa Lillien !
WIN IT!
I have great news for one MIBR reader, I have an awesome Del Monte Gift pack including (1) Can Del Monte® Petite Cut® Diced Tomatoes with Green Chilies, (1) can Del Monte® Petite Cut® Diced Tomatoes with Chipotle Chilies and a $25 Visa gift card! Details on how to enter and official rules can be found using the Rafflecopter widget below!
a Rafflecopter giveaway
Disclosure: “The Del Monte products, information and two gift packs have been provided by Del Monte.”
Wednesday, December 12, 2012

With 5 kids, I’m never not busy. Seriously, some days I get going and by the time I actually have a minute to sit down and look at the clock it’s already 8 or 9—that’s crazy. Needless to say, I am all about products that make my life easier or save me time…especially in the kitchen.
It’s not that I don’t like to cook, really it’s not, as a matter of fact, way back when I wanted to be a chef (now, not so much), I just wish that cooking didn’t take up such a major part of my evenings, I’d love to be able to spend that time hanging out with the family and not in the kitchen. So when it comes to cooking gadgets that help cut my time in the kitchen, I am all for trying them out, just like I did with the Silpoura.
Now, if you’re like me you’re probably wondering what in the heck a Silpoura is and the most basic answer to that question is that it’s a clip-on spout to help make draining and pouring a whole lot easier, but its actually so much more than that.

The Silpoura clip-on spout clips onto almost an pot, pan and bowl and helps you to strain away all of the liquid from the food that you are cooking. Drizzle chocolate and caramel, pour hot soup, pour gravy, drain noodles or fruit and so much more! Silpoura is made of a high temperature food-grade silicone that cleans up easily and is dishwasher safe.
Silpoura works by clipping securely onto the side of virtually any bowl, pan or pot and allows you to easily strain the food you are preparing. While I don’t normally have a problem figuring products out, I did find myself saying “huh?” a few times as I looked over and then tried to follow the directions on the package. Once I did figure out how to attach the Silpoura to the side of the pan that I was using at the time, it not only looked different than it should (at least according to the pictures on the package), it was kind of of clumsy and not as secure as I thought it should be. While a few adjustments helped me get the product into the position it needed to be in I did find myself noticing that while the product is supposed to fit most cooking vessels (and in truth it does) it was definitely a lot easier straining the liquid using a medium size sauce pan than it was on a frying pan. Check out my video review of the Silpoura below…

While I do wish the product was a little easier to attach (and it’s possible that it was just me who had an issue with attaching the Silpoura) I do think it’s a major help in the kitchen…seriously, nothing strains a pot of macaroni better than the Silpoura (using a medium size sauce pan of course).
If you’re looking for something unique to give the foodie in your life, why not try the Silpoura, it’s different, it’s useful and it’s under $10…you can’t beat that! Don’t forget to check out the Silpoura and tons of other great gift ideas online in our 2012 holiday gift guide!
BUY IT!
You can pick up Silpoura online at the Silpoura website starting at less than $10!
WIN IT!
One Misadventures in Baby Raising reader is going to win a Silpoura…check out the Rafflecopter widget below for official rules and to enter!
a Rafflecopter giveaway
Disclosure: I received the product mentioned above in order to facilitate my review…all opinions are my own!
Friday, June 18, 2010
With Father’s Day quickly approaching the scramble to secure last minute gifts is on! So what do you get for the guy who you love most? A neck tie? A pack of socks? Maybe a “Worlds Greatest Dad” mug? Those gifts have been done and done again so why not give the dad in your life something he’ll be sure to appreciate…give him the gift of food! I mean come on every woman knows that the way to a mans heart is through his stomach! I have a few killer recipes from Mrs. Butterworth, Franks Red Hot, French’s Mustard, and Duncan Hines to share with you that will be sure to please dad!
Let’s say we’re building the perfect Father’s Day feast…breakfast, lunch, dinner, and dessert…this is going to be yummy! We’ll start with breakfast, heck why not even serve it to him in bed (hey, mom is not the only one who deserves breakfast in bed every once in a while). So what would the perfect breakfast be? Let’s see…how about Hawaiian French Toast? Sounds delicious!
1 tablespoon, BUTTER
2 EGGS, beaten
1 teaspoon, CINNAMON
4-8, HAWAIIAN SWEET ROLS, cut in half
1/2 cup, MRS. BUTTERWORTH’S SUGAR FREE SYRUP, warm
THE STEPS
1: Heat butter in a large pan over medium-high heat.
2: In a large bowl mix eggs and cinnamon.
3: Dunk rolls into mixture and coat thoroughly.
4: Cook bread until golden brown on both sides about 3-5 minutes each side.
5: Warm your syrup in the microwave and pour over toast.
Now let’s move on to lunch…how about something hot and spicy? Sounds perfect for the man in my life and I hope the man in yours thinks so too! How do chicken wings sound? That’s what I thought…perfecto!
¾ cup FRANK'S® REDHOT® Buffalo Wings Sauce
1. BAKE wings in foil-lined pan at 500°F on lowest oven rack for 20 to 25 min. until crispy, turning once.
2. TOSS wings in Buffalo Wing Sauce to coat.
Makes-6 to 8 servings
Tip: You may substitute 1/2 cup FRANK'S® REDHOT® Sauce mixed with 1/3 cup melted butter for the Buffalo Wing Sauce.
Alternate Cooking Directions: Deep-fry at 375°F for 10 min.
Broil 6-inches from heat 15 to 20 min., turning once.
Grill over medium heat 20 to 25 min., turning often.
Now onto dinner! Something grilled sounds wonderful to me and what a perfect opportunity to show your dad or hubby what a grill mistress you are!
2/3 cup Ranch salad dressing
1/3 cup FRENCH'S® Classic Yellow® or Honey Mustard
¼ cup dark brown sugar
4 (5 oz.) boneless skinless chicken breasts, seasoned with salt and pepper to taste
1. MIX salad dressing, mustard and sugar. Pour 2/3 cup mixture over chicken.
2. MARINATE chicken in refrigerator 30 min. or up to 3 hours.
3. GRILL chicken on greased rack over medium heat for 15 min. or until done. Serve chicken with remaining mustard mixture.
Makes 4 servings
Tip: Substitute boneless pork chops.
Let me tell you, the Tangy Ranch Grilled Chicken was a huge hit at our house! So we have one course left…oh yes and it’s everyone’s favorite…especially dad! So maybe the dad in your life likes football…and cake?
 Ingredients:
•1 pkg Duncan Hines® Moist Deluxe® Devil's Food Cake Mix
•1 tub Duncan Hines® Creamy Home-Style Classic Chocolate Frosting
•1 (0.68 oz) tube white glossy decorating gel
Baking Instructions:
1. Preheat oven to 350°F. Grease and flour 10-inch round cake pan.
2. Prepare cake according to package directions for basic recipe. Bake at 350°F 45 to
50 minutes or until toothpick inserted in center comes out clean.
3. Cut cake and remove 2-inch slice from center. Arrange cake as shown. Spread chocolate frosting on sides and top of cake. Make white frosting laces on football, using decorating gel.
Or maybe he likes brownies and cookies? Duncan Hines has that covered as well!
![clip_image002[11]](https://blogger.googleusercontent.com/img/b/R29vZ2xl/AVvXsEiQiMb3pJrs5XUjB9DESpYilmjL9jbNroGgtAT0U8IFw_hQFVfxWrXzA7eWSZct_h0bHgBYr85g32uH-BRufoV68sBa0VdjhebtoQWn6nigHGIq2ka2e9Ph89ymZZhJFdomO3UYYSjakTM/?imgmax=800 "clip_image002[11]") Ingredients:
Ingredients:
Cookies:
Baking Instructions:
Let’s say we’re building the perfect Father’s Day feast…breakfast, lunch, dinner, and dessert…this is going to be yummy! We’ll start with breakfast, heck why not even serve it to him in bed (hey, mom is not the only one who deserves breakfast in bed every once in a while). So what would the perfect breakfast be? Let’s see…how about Hawaiian French Toast? Sounds delicious!
Hawaiian French Toast
INGREDIENTS
1 tablespoon, BUTTER
2 EGGS, beaten
1 teaspoon, CINNAMON
4-8, HAWAIIAN SWEET ROLS, cut in half
1/2 cup, MRS. BUTTERWORTH’S SUGAR FREE SYRUP, warm
THE STEPS
1: Heat butter in a large pan over medium-high heat.
2: In a large bowl mix eggs and cinnamon.
3: Dunk rolls into mixture and coat thoroughly.
4: Cook bread until golden brown on both sides about 3-5 minutes each side.
5: Warm your syrup in the microwave and pour over toast.
Now let’s move on to lunch…how about something hot and spicy? Sounds perfect for the man in my life and I hope the man in yours thinks so too! How do chicken wings sound? That’s what I thought…perfecto!
BUFFALO CHICKEN WINGS
Prep Time: 10 min. Cook Time: 20 min.![clip_image002[6]](https://blogger.googleusercontent.com/img/b/R29vZ2xl/AVvXsEi3Mc3g0jVky2nZMSWwnMTpd2PtW2awfqWyBWkMnPWvbFoGZqi8o0HJhTwZrqZTke9BuweUr7JUKB5bjoZFn3WuRFfXmzY3OcW18zPt8BjPR68aLMkkvNF8AlfWPC-6jhcIs2buRzmBO7s/?imgmax=800 "clip_image002[6]")
2 1/2-lbs. chicken wing pieces![clip_image002[6]](https://blogger.googleusercontent.com/img/b/R29vZ2xl/AVvXsEiNYake4hSgLK6luY9_4pc4hCYXax0FZpA4TqA7Hmuf5ZWdb75BHP33M4RIJiTDKwxFYlPQinshptyeUTwyuyZU7I2L-YYCGtmlr9g_Xsm_G77Xwk_kt-1wkffydezfL0uifr4-QJfr5GY/s1600-h/clip_image002%5B6%5D%5B5%5D.jpg "clip_image002[6]")
¾ cup FRANK'S® REDHOT® Buffalo Wings Sauce
1. BAKE wings in foil-lined pan at 500°F on lowest oven rack for 20 to 25 min. until crispy, turning once.
2. TOSS wings in Buffalo Wing Sauce to coat.
Makes-6 to 8 servings
Tip: You may substitute 1/2 cup FRANK'S® REDHOT® Sauce mixed with 1/3 cup melted butter for the Buffalo Wing Sauce.
Alternate Cooking Directions: Deep-fry at 375°F for 10 min.
Broil 6-inches from heat 15 to 20 min., turning once.
Grill over medium heat 20 to 25 min., turning often.
Now onto dinner! Something grilled sounds wonderful to me and what a perfect opportunity to show your dad or hubby what a grill mistress you are!
TANGY RANCH GRILLED CHICKEN![clip_image002[9]](https://blogger.googleusercontent.com/img/b/R29vZ2xl/AVvXsEiDNGCnuTaFzlWungYaR0ThBSRYMTtwtPELTOVvkgffQWg7CUi3dzZhdp_D9ZiTnUJ-iEp0GMkGJhj1-Hx4ub5qHcUHVkWpLn1Apgp6dDqkWQBMCSoDTobKguWpOy1El4sgDGbG8ceAS-c/?imgmax=800 "clip_image002[9]")
1/3 cup FRENCH'S® Classic Yellow® or Honey Mustard
¼ cup dark brown sugar
4 (5 oz.) boneless skinless chicken breasts, seasoned with salt and pepper to taste
1. MIX salad dressing, mustard and sugar. Pour 2/3 cup mixture over chicken.
2. MARINATE chicken in refrigerator 30 min. or up to 3 hours.
3. GRILL chicken on greased rack over medium heat for 15 min. or until done. Serve chicken with remaining mustard mixture.
Makes 4 servings
Tip: Substitute boneless pork chops.
Let me tell you, the Tangy Ranch Grilled Chicken was a huge hit at our house! So we have one course left…oh yes and it’s everyone’s favorite…especially dad! So maybe the dad in your life likes football…and cake?
Football Cake
For the Dad who is a fan of all things football, a cake that’s easy to make and can be personalized with his favorite sports team!

•1 pkg Duncan Hines® Moist Deluxe® Devil's Food Cake Mix
•1 tub Duncan Hines® Creamy Home-Style Classic Chocolate Frosting
•1 (0.68 oz) tube white glossy decorating gel
Baking Instructions:
1. Preheat oven to 350°F. Grease and flour 10-inch round cake pan.
2. Prepare cake according to package directions for basic recipe. Bake at 350°F 45 to
50 minutes or until toothpick inserted in center comes out clean.
3. Cut cake and remove 2-inch slice from center. Arrange cake as shown. Spread chocolate frosting on sides and top of cake. Make white frosting laces on football, using decorating gel.
Or maybe he likes brownies and cookies? Duncan Hines has that covered as well!
EASY CHOCOLATE PEANUT BUTTER BROWNIE COOKIES
Easy Chocolate Peanut Butter Brownie Cookies are a perfect marriage of rich chocolate and creamy peanut butter, easy to make and fun to share.
![clip_image002[11]](https://blogger.googleusercontent.com/img/b/R29vZ2xl/AVvXsEgcOFU6s_xRylqDPxh41ucTvqJXqB58Nzn4uVQMreBfQWKUWiSk-kDeT6QKqTnrzoHelwWHXiCCrxPSum0a0SIURelJJlN6tyFWPYueFu5Tslo8jNOqEUJIEdy5ZcN5_D0cc9ZOUgrFd5M/s1600-h/clip_image002%5B11%5D%5B3%5D.jpg "clip_image002[11]")
Cookies:
- 1 box Duncan Hines® Chewy Fudge Brownie Mix or Duncan Hines® Milk Chocolate Brownie Mix
- 1/4 cup butter
- 4 oz of softened cream cheese
- 1 egg
- 1 cup powdered sugar
- 1 cup peanut butte
Baking Instructions:
- Heat oven to 350°F. In medium bowl, beat brownie mix, softened butter, softened cream cheese and egg. Mix either by hand or by using a mixer.
- Roll 1 tablespoon of dough into balls and place on lightly greased or parchment lined cookie sheets about 2 inches apart. Should make 2 1/2 dozen cookies.
- In a small bowl, mix powdered sugar and peanut butter together and roll into small balls using about 1 teaspoon. Press peanut butter balls into surface of uncooked brownie cookies and slightly flatten cookie. Bake for 12 minutes or until edges are set. Cookies may appear slightly under cooked, but do not overbake. Cool on cookie sheets for about 3 mins and transfer to wire rack.
- If Desired: Place 6 tablespoons of frosting into a microwave safe container and melt (30 seconds), drizzle melted chocolate over top of cookie. Cool.
- For easy clean up, place wax paper or parchment paper under wire rack -- then drizzle the frosting on cookies
*I was provided coupons in order to try out the recipes mentioned above to facilitate this post*
Tuesday, November 3, 2009
**Updated at bottom with winners**
Thanks to all who entered!

As you’ve seen in episodes of Cooking With My Misadventurous Kids I love cooking quick, easy, affordable meals. With four children I have very little time to cook elaborate meals. Anything that can be done quickly and with not much effort while still being tasty and affordable is right at the top of my Go-To list!
I recently had the chance to try out some of the new Tyson Heat ‘N Eat entrees. I’ve tried other brands of heat and serve meals before trying the Tyson brand and while they were similar I think the Tyson brand of Heat ‘N Eat entrees offer more variety and more specialized flavors. Here’s more about Tyson’s Heat ‘N Eat entrees from the website:
Tyson is dedicated to creating products that fit your needs and your lifestyle. So Tyson introduces Refrigerated Heat ‘N Eat Entrées. It is a line of fully-cooked delicious entrée meats. Now your family can enjoy a wholesome meal that tastes like it took all day to prepare. There are no preservatives and are completely vacuum sealed for freshness. It will go from the refrigerator to your dinner table in just minutes.
Tyson refrigerated dinner meats are made with high quality Tyson chicken, beef, and pork that is perfectly seasoned and slow cooked, ready to heat in the microwave or oven.
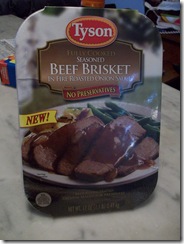
I tried a couple varieties of the Tyson Heat ‘N Eat meals and while they were all good I have to admit I had a definite favorite; Beef Brisket with Fire Roasted Onion Sauce (yummo). One thing I do have to mention is that my store (Super WalMart) only had six of the 12 varieties available, so my selection was limited. I loved how super convenient these entrees were, within minutes the entrees were piping hot and ready to serve which is a BIG plus for busy moms. I made the Beef Brisket and paired it with mashed potatoes, green beans, and rolls and it was all done and on the table in less than 20 minutes! One thing I do have to mention about the meals is that the serving sizes are very small, one of the Beef Brisket entrees was not enough for our family of 5 (the baby hasn’t mastered brisket yet..lol) we had to make two in order for everyone to have seconds! Aside from the serving sizes I LOVE the Tyson Heat ‘N Eat entrees…super convenient, reasonably prices, and very yummy!
And now Foodnetwork’s Robin Miller has teamed up with Tyson to bring you quick, easy, delicious recipes using the Tyson Heat ‘N Eat entrees!
Brisket Quesadillas with Creamy Salsa Dip
Recipe Courtesy of Robin Miller and Tyson Foods

Prep Time: 10 minutes
Cook Time: 6 minutes
Servings: 4
Ingredients:
1 package (17.6 ounces) Tyson® Braised Beef Brisket with Mild Chili Sauce, thawed
1 cup shredded reduced-fat cheddar cheese (mild or sharp)
4 ounce can diced green chilies
8 (taco-size or 8-inch) whole wheat tortillas
1/2 cup light sour cream
1/2 cup prepared salsa
2 tablespoons chopped fresh cilantro, optional
Cooking Instructions:
- Coat a large skillet, griddle or strove-top grill pan with cooking spray and preheat to medium-high.
- Empty contents of brisket into a large bowl, and using two forks, pull the beef apart into shreds. Add cheese and green chilies and mix well.
- Arrange tortillas on a flat surface and spoon the brisket mixture onto one side of each tortilla. Fold over the un-topped side, covering the filling. Place the quesadillas on a hot pan and cook three minutes per side until tortillas are golden brown and cheese melts.
- In a medium bowl, whisk together the sour cream, salsa and cilantro (if using). Cut each quesadilla in half crosswise and serve with sour cream dip on the side.
Great news…two of my amazing readers is going to get to try the Tyson Heat ‘N Eat entrees for themselves!
Buy it! Tyson Heat ‘N Eat entrees are available at grocery stores nationwide!
Win it! To be entered into this giveaway please visit Tyson.com and look at all of the Heat ‘N Eat entrees available, come back here and leave me a comment telling me which flavor(s)you would love to try! This is mandatory and must be completed before any extra entries are counted!
Extra Entries! Please leave separate comments for each extra entry!
- Follow Misadventures in Baby Raising via my RSS Feed, through Email, or on Blogger…2 extra entries each!
- Grab one (are all) of my buttons (please note that my MIBR button has changed, please grab the new code and change it on your blog)…2 extra entries each!
- Blastoff with me, join the Blastoff network (save money, make money) by clicking the following link: http://ppl.blastoffnetwork.com/allisonproffitt…5 extra entries!
- Follow me on Twitter and Tweet about this giveaway…1 Tweet Per Day=1 extra entry per day!
- Become a Fan of Misadventures in Baby Raising on Facebook…3 extra entries!
- Blog about this giveaway with links to this post and Tyson…5 extra entries!
This giveaway ends on Tuesday November 17, 2009 at 11:59 PM EDT. Two winners will be chosen via Random.org and announced on this post! Winners will have 48 hours to contact me and claim their prize, failure to do so will result in the winner(s) forfeiting their prize(s).
Good Luck!
US Entries only please!

Winning numbers are:
Random Integer Generator
Here are your random numbers:
110 171
Timestamp: 2009-11-19 06:44:18 UTC
And the winning comments are:
Sunday, September 27, 2009

I will be the first to admit that I am not all that adventurous when it comes to cooking and eating. I pretty much cook the same classic American meals that I grew up eating. Every now and then I’ll get adventurous and try something new but that is a rare occasion.
Recently I was introduced to Destination Dinners when I was approached to do a review for them. Destination Dinners was established in 2006 by Lisa Diamond, who is a self-proclaimed “culinary adventurer”. Destination Dinners offer it’s customers several different recipe kits featuring food from all over the world. Each recipe kit is designed to give the recipient a delicious, authentic, dinner for four, and in addition to the food each kit includes fun and educational facts and tidbits about the destination you choose. From exotic locals like Thailand, Lebanon, Jamaica, and Israel to the best of New Orleans there is sure to be something to please even the pickiest eaters!
I received the Falafel Destination Dinner Kit to review, and as soon as I opened the box I was instantly transformed to Israel. The smell of ground cumin and chili peppers filled the air as soon as I opened the red Destination Dinners box. My Destination Dinner kit contained the non-perishable ingredients needed to prepare Falafel with “Hellfire” Harissa Sauce, a booklet telling all about Israel, and a grocery list to shop for the fresh ingredients needed to make the dish. As I prepared the falafel I couldn’t help but feel a sense of adventure. As we sat down to eat I could see the apprehension on my children’s faces (they are not very adventurous in the food department either) but that quickly faded as they cautiously sampled the first few bites. It didn’t take long for their plates to be empty and for them to demand that we have fawafel (what 2 of the kids called it) again soon.


In addition to their dinner kits, Destination Dinners offers its customers party kits, gift sets, and gift certificates. If you’re feeling adventurous and in the mood for something unusually wonderfull, I would recommend Destination Dinners! Destination Dinner Kits would make a unique birthday, hostess, or holiday gift as well!
Buy it! You can purchase Destination Dinner Kits online at destinationdinners.com
Be sure to check out this and other great holiday gift ideas in my Holiday Gift Guide 2009!

Subscribe to:
Posts
(
Atom
)

Popular Posts
-
 I am always on the lookout for new products for my kids and it's become an obsession to find only the safest most natural products for t...
 -
As much as I love Halloween, I am more than a little happy that it is done and over with, why you ask? Well, because I love the holiday se...
-
I don’t know about you, but one thing that always puts a smile on my face is candy! I can be in the worst mood ever, unwrap a pi ece of my ...


I follow
follow your blog
kngmckellar@hotmail.com